How To Fix Rubbermaid Mop Bucket?
Assuming you are referring to the Rubbermaid WaveBrake Mopping System: To fix a Rubbermaid mop bucket, you will need to replace the parts that are cracked, damaged, or worn out. The most common problems with Rubbermaid mop buckets are cracked buckets, worn out wringers, and broken handles.
Rubbermaid mop bucket flaw
- Assess the damage to your rubbermaid mop bucket
- If there are just a few cracks or holes, you may be able to repair the bucket with some epoxy or other adhesive
- Clean the surface of the bucket where you will be applying the adhesive, to ensure that the repair will hold
- Apply the adhesive to the surface of the bucket, and then use a piece of cloth or tape to hold it in place while it dries
- Allow the adhesive to dry completely before using the bucket again
- If the damage is more significant, you may need to replace the bucket entirely
Rubbermaid mop bucket/wringer
If you are in the market for a new mop bucket and wringer, you may want to consider the Rubbermaid mop bucket/wringer. This product is designed to make mopping your floor a breeze. Here is what you need to know about the Rubbermaid mop bucket/wringer.
The Rubbermaid mop bucket/wringer is made from durable plastic that is built to last. The bucket has a capacity of 18 quarts, making it large enough to hold plenty of water for mopping. The wringer is also made from durable plastic and can be attached to the bucket for easy wringing.
The Rubbermaid mop bucket/wringer has a number of features that make it a great choice for mopping your floor. The bucket has a pour spout that makes it easy to empty, and the wringer has a foot pedal that makes it easy to operate. The wringer also has a ratchet handle that makes it easy to adjust the tension, so you can wring out as much water as you need.
The Rubbermaid mop bucket/wringer is an affordable option for those who are looking for a quality mop bucket and wringer. This product is a great choice for those who want a durable product that is easy to use.

Credit: www.toolboxsupply.com
How do you put the spring on a Rubbermaid mop bucket?
If you’re finding that your Rubbermaid mop bucket isn’t performing as well as it used to, it might be time to put a new spring on it. Here’s how to do it:
1. First, you’ll need to remove the old spring.
To do this, simply unscrew the two screws that hold it in place.
2. Next, take your new spring and place it in the same spot as the old one. Make sure that the hooks on the spring are facing the same direction as the ones on the old spring.
3. Finally, screw the new spring in place and give it a few test pulls to make sure it’s secure.
That’s all there is to it! With a new spring in place, your Rubbermaid mop bucket should be good as new.
How do you disassemble a mop bucket?
Assuming you mean a traditional round mop bucket with a wringer attached:
1. Unscrew and remove the wringer. Some wringers have a pin that needs to be lifted in order to remove them, so consult your owner’s manual if you can’t seem to get it off.
2. Unclip the mop bucket from the stand, if it’s attached.
3. Turn the bucket upside down and unscrew the large cap on the bottom. This will give you access to the inside of the bucket.
4. Empty out any water or debris that may be inside.
5. Wash the bucket with soap and water, then dry it thoroughly.
6. Reassemble the bucket in the reverse order of disassembly.
How does a mop bucket wringer work?
When you are done mopping the floor, you need to wring out the mop head to remove the excess water. This is where a mop bucket wringer comes in handy. A mop bucket wringer is a device that is attached to the mop bucket and is used to wring out the mop head.
To use the wringer, you simply place the mop head into the wringer and then turn the handle. The wringer will spin the mop head and remove the excess water. You can then put the mop head back into the mop bucket and continue mopping.
A mop bucket wringer is a great way to remove the excess water from the mop head and to make mopping quicker and easier.
How do you put a wringer on a mop bucket?
If you’re wondering how to put a wringer on a mop bucket, you’ve come to the right place. In this blog post, we’ll walk you through the process step-by-step so you can get your wringer set up in no time.
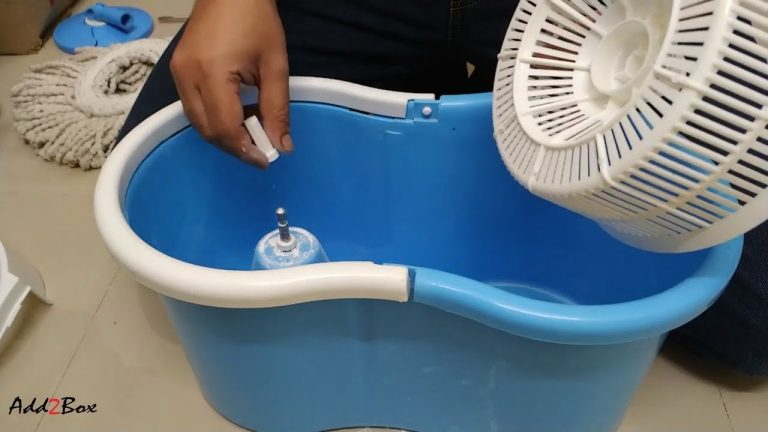
First, you’ll need to identify the two parts of the wringer that need to be attached to the mop bucket – the base and the handle.
The base of the wringer will have suction cups on the bottom, which will need to be lined up with the holes on the top of the mop bucket. Once the base is in place, you can thread the handle through the hole in the bucket’s handle and screw it in place.
Now it’s time to start using your wringer!
To do so, simply dip your mop in the bucket of water and then feed it through the wringer. The wringer will do its job and remove excess water from the mop, making it easier to clean your floors.
We hope this blog post has helped you figure out how to put a wringer on a mop bucket.
If you have any further questions, feel free to reach out to us and we’ll be happy to help.
Conclusion
If your Rubbermaid mop bucket is starting to show signs of wear and tear, there are a few things you can do to fix it. First, try cleaning the bucket with warm, soapy water. If that doesn’t work, you can try using a mild abrasive cleaner.
If the bucket is still in good shape but the handle is starting to come loose, you can try tightening the screws or replacing the handle. Finally, if the bucket is beyond repair, you can always buy a new one.