How to Use Handheld Vacuum Sealer
If you’re looking for an easy way to keep your food fresh and prevent freezer burn, a handheld vacuum sealer is the perfect tool. A handheld vacuum sealer uses special bags to remove air from around the food and create an air-tight environment that will protect it from moisture and oxidation. This can extend the life of many foods by up to five times their normal shelf life, saving you money in the long run.
Not only does a handheld vacuum sealer save space in your refrigerator or freezer by reducing bulky packages, but it also helps you portion out meals so that nothing goes to waste. With just a few simple steps, anyone can learn how to use a handheld vacuum sealer effectively.
Food Saver Handheld Vacuum Sealer!!
- Prepare the Food: Start by preparing your food item for vacuum sealing
- Make sure that all excess liquids and oils are removed, as they can leak out of the seal during packaging and damage your device
- Place Food in Bags: Place the prepared food into a suitable vacuum bag or pouch designed for use with a handheld vacuum sealer
- It is important to make sure that you do not overfill the bags, as this will prevent them from forming an airtight seal properly when being processed through the machine
- Insert Bag into Device: Once you have placed your food items inside their respective bags, insert one end of each bag into the chamber of your handheld vacuum sealer device until it reaches its maximum capacity (usually around 6 inches)
- Your device should then be ready to begin sealing process once activated via its power button/switch
- 4 Activate Vacuum Sealing Process: Switch on your machine’s power button/switch to activate its internal pumps which will draw out all external air from within the chamber while simultaneously heating up two metal bars located within it – creating an air-tight seal across both sides of each bag inserted in it at once! When finished, switch off your machine and remove sealed packages from its chamber immediately afterwards using kitchen tongs or oven mitts as required; depending upon how hot these bars become after processing – usually only takes around 10 seconds per package!
How to Use Handheld Sealer on Foodsaver
If you’re looking for an easy way to store food and protect it from spoilage, then a handheld sealer is the perfect solution. A handheld sealer works with your Foodsaver vacuum sealing system to make storing food easier than ever before. This blog post will provide detailed instructions on how to use this helpful kitchen tool.
The first step is to place the bag that contains the item you want sealed into the vacuum chamber of your Foodsaver machine. Make sure that the opening of the bag is facing up so that air can be pulled out during sealing process. Then, place one end of your handheld sealer into the open slot on top of your Foodsaver machine and press down firmly until it clicks in place.
Now, turn on both machines by pressing their respective power buttons – one for each device – and wait for them to finish preheating (this should only take a few seconds). When they’re ready, slowly lower your bag into position overtop of where both devices meet (it should fit snugly around both) and hold it there while pressing down gently with even pressure all around its edges so as not to damage either device or cause any leaks during operation..
Once everything looks secure, press down firmly on top of the trigger located at front-center of your handheld sealer until you hear two loud clicks indicating successful sealing has taken place; if not done correctly, this may require some extra force due repeat attempts until desired results are achieved! Finally remove any excess air trapped inside by using scissors or other sharp object like a knife tip poke holes near bottom corner(s) prior disposing away after finished usage altogether – just remember always read manufacturer’s instructions carefully before operating these tools properly every time!
Congratulations!
Foodsaver Handheld Vacuum Sealer Not Working
If you’re having trouble with your Foodsaver Handheld Vacuum Sealer not working, don’t panic! There are a few simple things you can do to troubleshoot the issue and get it up and running again.
First, check the power cord connections to make sure everything is plugged in correctly.
If that doesn’t work, try pressing the reset button on the back of the device (if applicable). This will usually resolve any power-related issues.
Next, inspect your vacuum sealer’s lid gasket for signs of wear or damage.
If it appears worn out, replace it with a new one before continuing troubleshooting. The gasket helps create an airtight seal between the lid and bag when food is being sealed, so if it isn’t functioning properly then sealing won’t be successful either!
You should also check that all components inside the handheld vacuum sealer are connected securely—the motor and control board should both be firmly attached to their respective spots on either side of the unit’s body.
If anything appears loose or disconnected then reattach them as necessary before continuing further diagnostics steps.
Finally, test your handheld vacuum sealer by placing a piece of paper towel in its chamber and closing down its lid slowly until fully sealed shut – if there’s no suction from within after this point then you may need to replace its internal motor as well as clean away any dust particles which could have been blocking airflow around where they attach together at each corner too! That said if all else fails contact customer support directly so they can help diagnose what exactly might have gone wrong with yours specifically and suggest possible solutions accordingly e.g., replacing certain parts etcetera…
Hopefully these tips were helpful for getting your Foodsaver Handheld Vacuum Sealer working again quickly & easily!
Foodsaver Handheld Vacuum Sealer Bags
Are you looking for the perfect way to store and preserve your foods? If so, then the FoodSaver handheld vacuum sealer bags are a great choice. Not only do they help keep food fresh longer, but they also save money by eliminating waste.
Here’s everything you need to know about this handy kitchen tool:
The FoodSaver handheld vacuum sealer bags are designed to provide an airtight seal around any type of food item in order to prevent freezer burn and spoilage. The sealing process is simple and easy – just place whatever item you want sealed into one of the pre-cut bag sizes, insert the nozzle attached to the device onto the bag opening and press down on top of it until all air has been removed from inside and a tight vacuum seal is achieved.
Once sealed, these bags will extend the life of meat, cheese, fruits & vegetables up to five times longer than traditional methods such as plastic wrap or aluminum foil!
FoodSaver Bags come in a variety of sizes ranging from pint size (perfect for small items) up through extra large gallon size (suitable for larger frozen items). The bags are made with durable multi-layer construction which ensures that no oxygen can penetrate them during storage; this helps keep their contents fresher for much longer periods than typical plastic wraps or containers would be able to provide.
Additionally, because these bags don’t require additional wrapping materials like saran wrap or aluminum foil they offer an eco-friendly alternative that saves both time and money while helping reduce waste!
In addition to being environmentally friendly, these FoodSaver Handheld Vacuum Sealer Bags are also incredibly convenient – not only can they be used in combination with other Foodsaver products such as mason jars or marinating dishes but they can also be stored away easily since each bag rolls flat after use. This makes it ideal for those who want space savings without sacrificing quality preservation!
Finally if there ever comes a time where you need something different out of your storage options then simply cut open one side using scissors – once open again air will flow back into them making them reusable multiple times over All things considered it’s clear why many people love using these types of Storage solutions!.
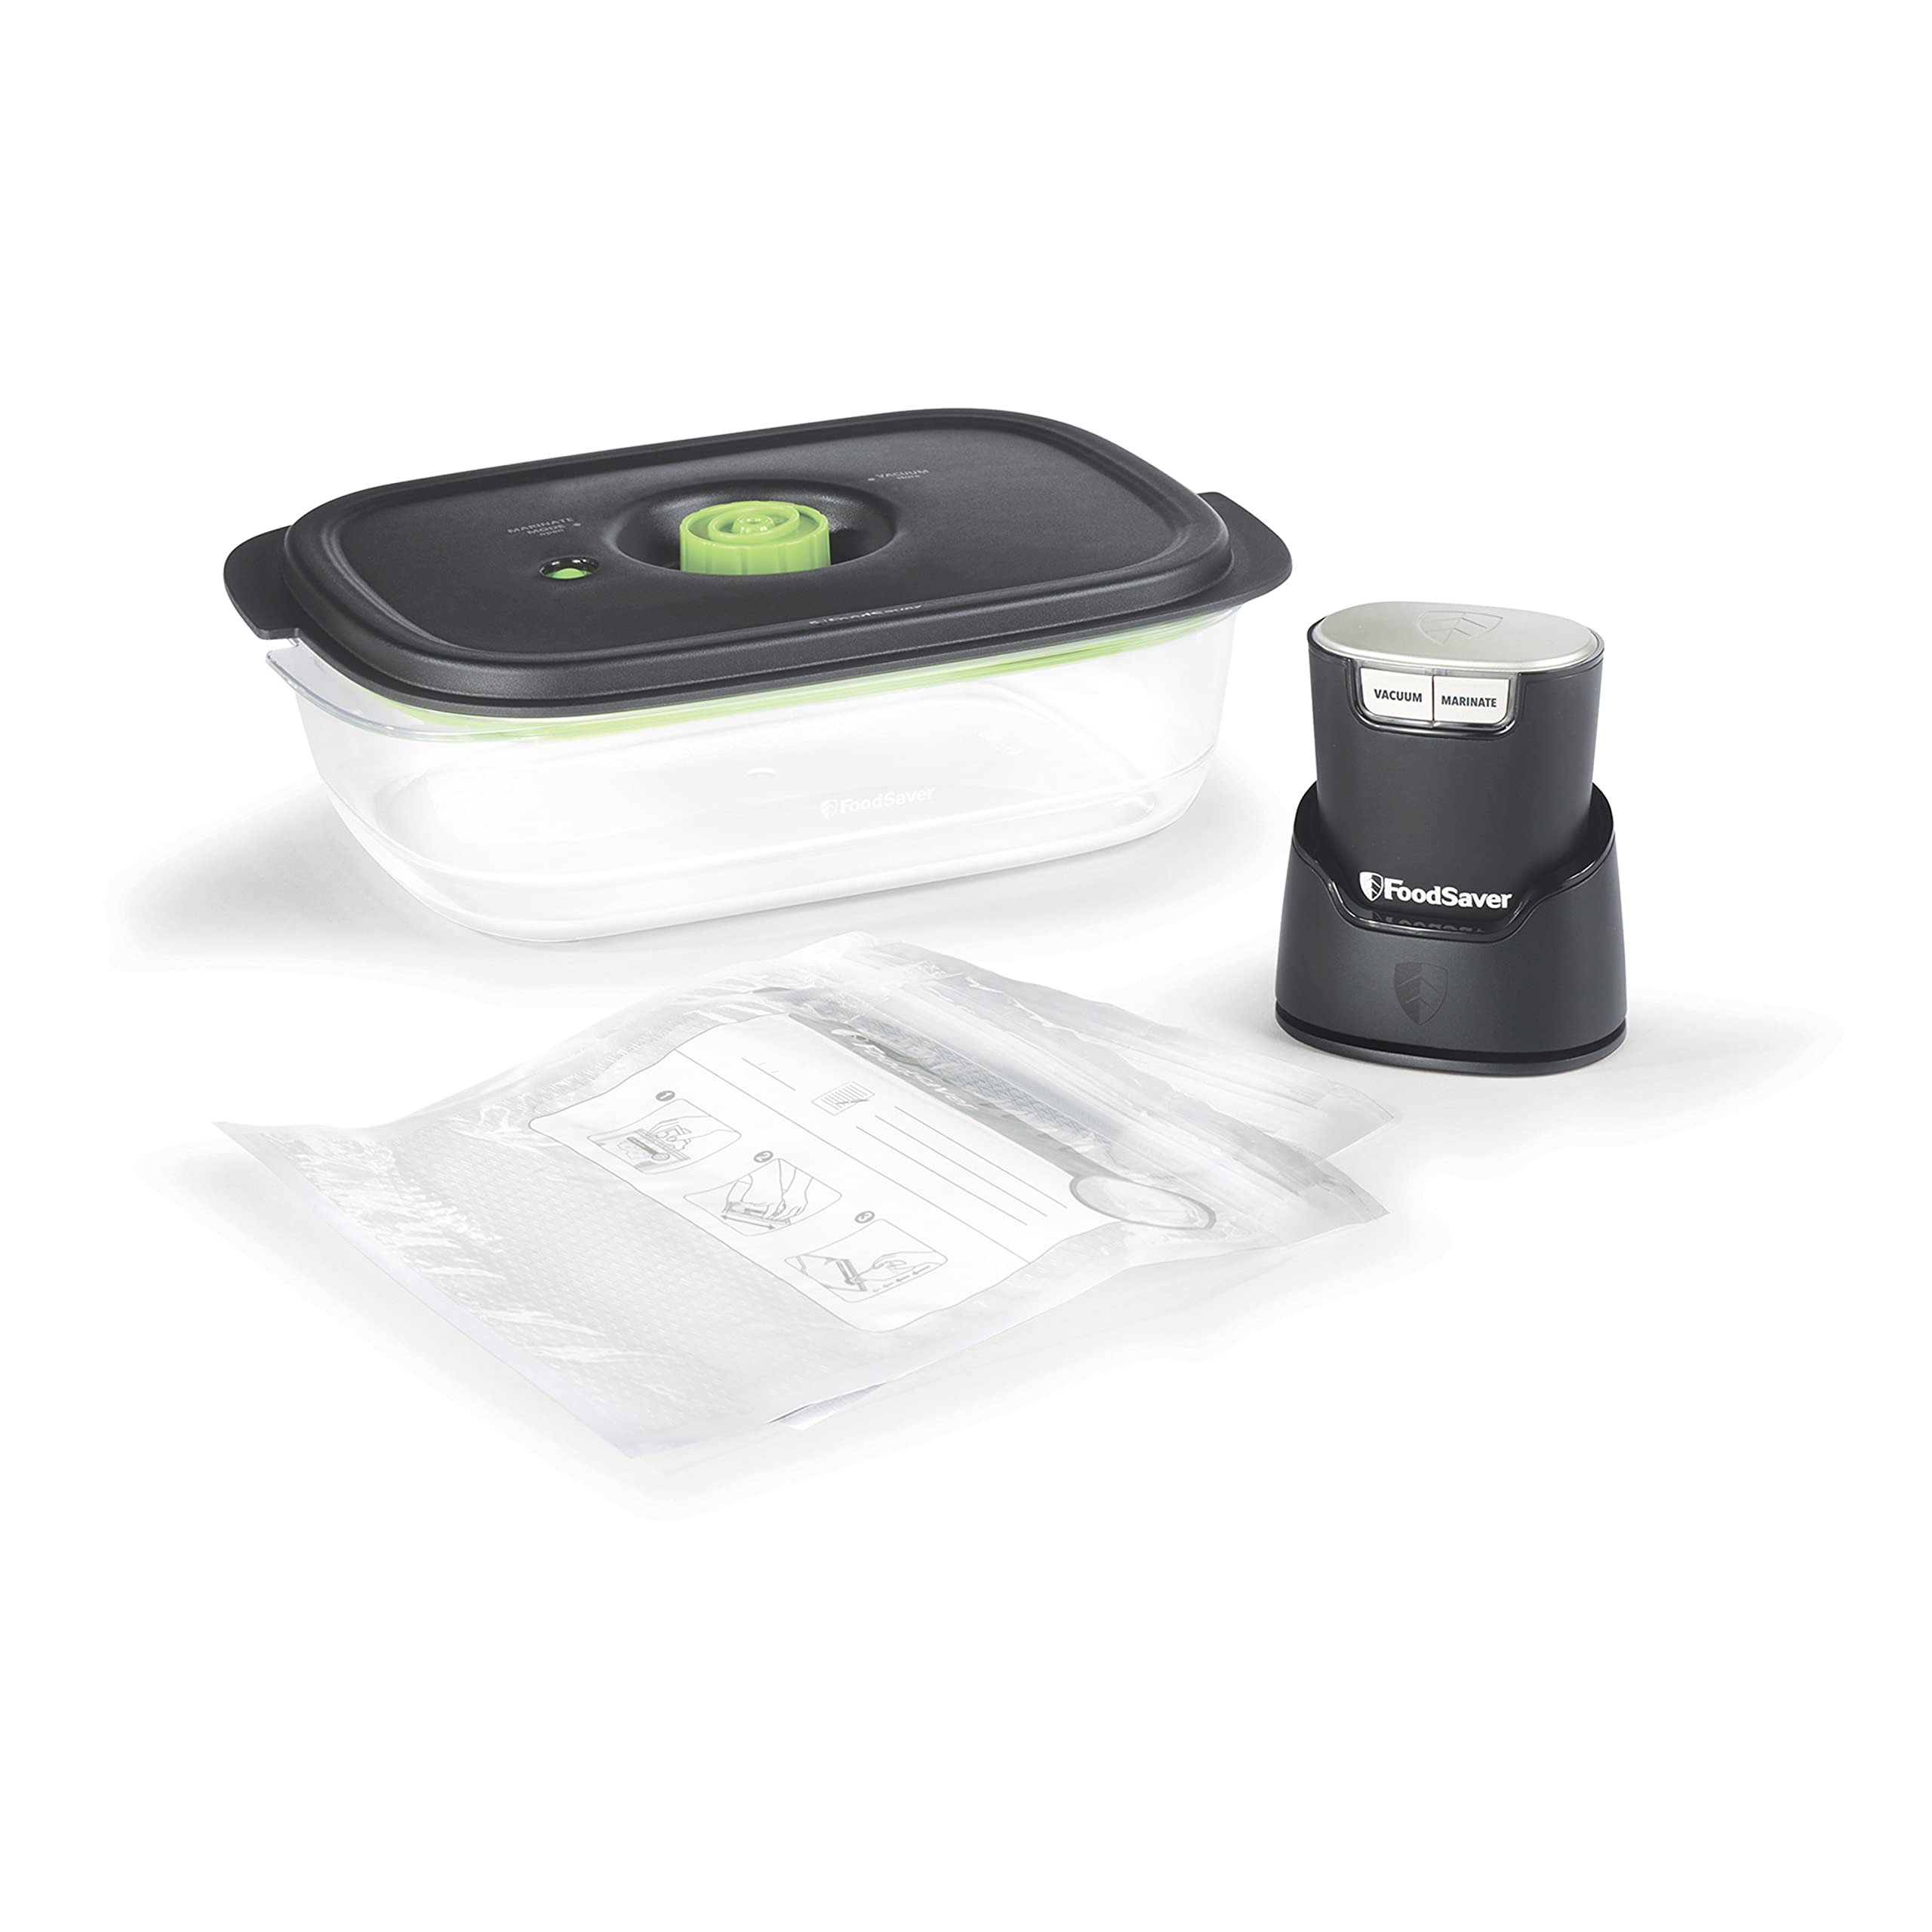
Foodsaver Multi-Use Handheld Vacuum Sealer
If you’re looking for a simple way to store and preserve your food, then the Foodsaver Multi-Use Handheld Vacuum Sealer is the perfect tool for you. This vacuum sealer has a variety of features that make it an easy and convenient way to keep food fresh longer.
The multi-use handheld vacuum sealer comes with two different lid options: one for sealing liquids and another for sealing dry goods.
With these lids, foods can be sealed quickly without having to worry about them spilling or leaking out during storage. The device also includes a hose attachment that makes it easy to use on containers of any size.
What really sets this vacuum sealer apart from others is its unique heat-sealing technology.
This technology seals airtight bags quickly by using hot air instead of a manual pump or suction. It also has adjustable temperature settings so you can find the perfect amount of heat needed for each type of food item being sealed—making sure nothing gets overcooked or spoiled in the process!
Another great feature is its reusable zip closure system which allows users to create their own custom sized bags as opposed to buying pre-made vacuum bags from stores like Ziploc® .
Not only does this save time and money, but it also helps reduce waste since any excess bag material can be reused over again! Additionally, all parts are BPA free making them safe for both people and nature alike!
The Foodsaver Multi-Use Handheld Vacuum Sealer offers an incredibly useful solution when it comes to storing food long term without sacrificing flavor or texture.
Its convenient design, reliable performance, and versatile features make this product ideal if you want maximum convenience while preserving all kinds of foods in the best possible condition.
How to Clean Foodsaver Retractable Handheld Sealer
If you’re looking for a way to keep your food fresher, longer, then investing in a FoodSaver Retractable Handheld Sealer is an excellent choice. It allows you to quickly and easily vacuum seal foods so that they stay fresh for extended periods of time. But like any other kitchen appliance, it needs regular cleaning and maintenance in order to ensure optimal performance.
Here are some tips on how to clean your FoodSaver Retractable Handheld Sealer:
1. Unplug the unit before beginning the cleaning process. This is important for safety reasons as well as preventing electrical damage from water or moisture seeping into the device while it’s plugged in.
2. Remove all detachable parts such as the lid and nozzle by pulling them off gently with both hands until they pop out from their sockets securely on each side of the sealer body respectively (if applicable). Set these aside for later use during reassembly after cleaning is done.
3. Gently wipe down all surfaces of exposed exterior portions (including buttons and cords) with either a damp cloth or paper towel soaked with warm soapy water – avoiding getting excess liquid near openings at all costs!
Wipe dry afterwards if necessary using another clean cloth or paper towel afterward before moving onto next step(s).
Adjust settings back to original position when finished wiping down exterior surfaces too if needed- this will help ensure proper operation once everything has been put back together again post-cleaning session!
4 .
For tougher stains which cannot be removed just by wiping down with soap & water solution; dilute 1 part white vinegar mixed into 10 parts hot tap water inside container then submerge entire sealer head (minus cord/nozzle attachments) into mixture overnight -or- alternatively apply directly onto stained areas using cotton swabs first followed up afterwards soaking entire surface periodically throughout day until stain disappears completely over multiple applications depending upon severity level situation may require! To finish up lastly rinse thoroughly under running faucet one final time before drying off completely prior putting back together again ready for future use whenever needed next time around!
5 .
Credit: www.youtube.com
How Do You Use a Handheld Sealer?
Using a handheld sealer is an easy and efficient way to quickly package materials. Whether you’re packing food, documents or other items, having a reliable handheld sealer can help you get the job done quickly and effectively. Here’s how to use one:
1. Prepare your material for sealing – Before you begin using your sealer, make sure that whatever item needs to be sealed has been properly prepped so it will fit in the bag opening of the device. Measure the item before cutting open any plastic packaging materials so that it fits through the bag opening with ease.
2. Load film into the machine – Once everything is ready for sealing, load up your film roll into your handheld sealer by sliding it into place and securing it by tightening both side screws on either end of the roller holder located at each end of your device.
3. Set desired temperature – Depending on what type of material you are sealing (e.g., polyethylene, nylon films) select an appropriate temperature setting as indicated by arrows marked on top of your unit’s handle or knob located on its control panel near where you loaded up film roll earlier in step two above (note: if unsure check manufacturer instructions).
The higher temperatures may be required when working with thicker or multiple layers being sealed together while lower settings are typically used when dealing with thinner materials like paper or thin films such as mylar bags/rolls etc..
4 Seal material – Place packed item between heat-sealable surfaces and then close lid tightly over bag openings ensuring edge meets edge all around perimeter evenly without any gaps left unsealed inside edges otherwise this could lead to air leaks which would cause product spoilage over time due improper storage conditions created in those spots potentially leading to wasted money invested if not taken care off correctly upfront before actual closure process begins .
This should form a tight bond between two surfaces creating perfect hermetic barrier against outside influences providing superior protection against contamination from external sources allowing stored goods remain safe until they reach their destination safely intact without any damage whatsoever along route traveled no matter harshness environment encountered during transport itself which normally would prove fatal result otherwise thus making this method highly recommended choice amongst most experienced professionals industry alike no questions asked period !
How Do I Use Handheld Foodsaver Attachment?
If you are looking for a way to keep your food fresh longer, then the Handheld FoodSaver attachment is a great solution. This handy tool helps seal and store food items in special vacuum-sealed bags that prevent air from coming in contact with the food. Not only does this help maintain flavor and texture, but it can also extend the shelf life of many types of foods by several weeks or even months.
The first step to using your Handheld FoodSaver attachment is to purchase compatible vacuum bags, which should be available at most retail stores that sell kitchen supplies. Once you have some of these bags, take one out and place whatever item you want to preserve inside it. Then insert the bag into the device’s slot on top – make sure it’s lined up correctly so that all four sides remain sealed when finished.
Next, press down on both ends of the FoodSaver handle until they click into place – this will activate its suction power and start sealing the bag shut from both sides simultaneously. Depending on how much air was inside before starting, this process may take anywhere between 10-30 seconds per side; once complete there should be no sign of any remaining openings along either edge (and if there are then repeat steps two & three).
Once done sealing your food item(s), carefully remove them from their newly sealed containers while being careful not to tear open any edges!
If needed use scissors or other sharp objects in order to cut through tougher materials like plastic wrap without damaging what lies beneath. Finally store away in an appropriate area such as a refrigerator or freezer where temperatures remain consistent throughout each day/night cycle – doing so will ensure maximum longevity for whatever type product has been enclosed within these specially designed vacuum packs!
Can You Vacuum Seal With a Handheld Vacuum?
Vacuum sealing is a great way to preserve food and keep it fresh for longer periods of time. It’s also an effective way to store fragile items that may be damaged by other types of storage containers. But can you vacuum seal with a handheld vacuum?
The answer is yes, but with some caveats.
The main benefit of using a handheld vacuum for vacuum sealing is portability; if you need to take your sealed items on the go or just don’t have access to a traditional countertop model, a handheld option could work well for you. However, there are some important factors to consider before investing in one:
1) Suction Power – Handheld vacuums generally don’t provide as much suction power as their larger counterparts. This means they may not be able to achieve the same level of airtightness when sealing food or other items and may require more frequent resealing than what would be necessary with stronger machines.
2) Sealing Bags – You’ll need specialized bags designed specifically for use with handheld vacuums in order to get the best possible results when sealing items.
These bags typically contain thicker plastic layers which help create an airtight seal even without strong suction power from the machine itself.
3) Time – Vacuum-sealing with any type of machine requires patience and attention; however, since most handheld models offer weaker suction power than their larger counterparts, it can take significantly longer (upwards of several minutes per item). So make sure you set aside enough time before beginning this task if using a small device!
How Do You Use a Handheld Sealer With a Vacuum Zipper Bag?
If you’re looking for a way to store and protect your food, clothes, or other items from air, dust, and moisture then a handheld sealer with a vacuum zipper bag may be the perfect solution. Vacuum zipper bags are great for preserving the freshness of products while also keeping them organized and safe. But how exactly do you use one?
Here’s what you need to know about using a handheld sealer with a vacuum zipper bag.
First off, make sure that the size of your vacuum zipper bag is appropriate for the item(s) that you want to store inside it. Then place whatever it is that needs storing into the center of your bag so that it can easily be sealed up tight later on.
If needed, add any additional padding around these items as well such as bubble wrap or packing peanuts in order to keep them extra secure during storage time. Once everything has been placed inside correctly close up all four sides of your bag by zipping them together tightly before proceeding onto sealing it shut with your handheld sealer.
To begin sealing up your vacuum zipper bag simply turn on your device and press down firmly against one side of the already closed opening until both pieces have adhered together permanently along their full length edge-to-edge creating an airtight barrier between them (be sure not to overlap when doing this).
Make sure each end has securely connected before continuing onto repeating this process across all four sides until there is no longer any open space left in which air can escape through once finished – if done properly this should result in having an almost entirely enclosed pouch able to provide protection against external elements like dust or moisture over long periods without issue!
Once finished turn off your device again before carefully removing it away from where its just sealed ensuring nothing gets accidentally cut/torn apart while doing so – if needed trim away any excess material too at this point but make sure not to go overboard here either unless necessary otherwise be prepared for some potentially messy results afterwards! Lastly check out how well everything looks after being completed; if satisfied then congratulations – now all that’s left now is finding something else needing stored within another similarly sized vacuum zipper bags!
Conclusion
If you’re looking for a way to keep your food fresh longer, then a handheld vacuum sealer might be just the thing you need. This handy device uses suction power to suck all the air out of any sealed container or bag, leaving your food fresher and crunchier than ever before. Here’s how to use one:
First, make sure that whatever container or bag you are using is well-sealed before beginning the vacuum sealing process. Next, place the unit over the top of it and press down on the button or switch at its base. The machine will suck out all of the air inside in seconds!
When it’s finished, simply remove it from atop your item and enjoy fresher food for longer periods of time!
Using a handheld vacuum sealer is an easy way to extend shelf life and reduce waste due to spoilage. Not only does this method help preserve flavor but also helps reduce overall costs by allowing users to buy more items in bulk without having worry about them going bad too quickly!
So why not give it a try?