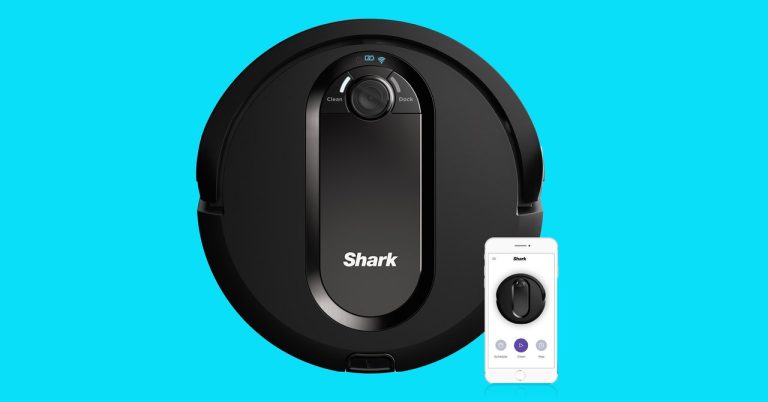
How to Take Apart Shark Robot Vacuum?

If your Shark robot vacuum is not working properly, you may need to take it apart to clean or replace parts. This can be a daunting task, but with a little patience and the right tools, it can be done. First, unplug the vacuum and lay it down on its back.
Then, remove the screws from the bottom plate using a Phillips head screwdriver. Next, remove the side brush by gently pulling it out of its socket. Continue by removing the dustbin assembly by pressing the release button and lifting it off.
Finally, remove the main brush roll by unscrewing the two screws that hold it in place.
- Disconnect the Shark vacuum from its power source
- Remove the dustbin by pressing the release button and lifting it out of the unit
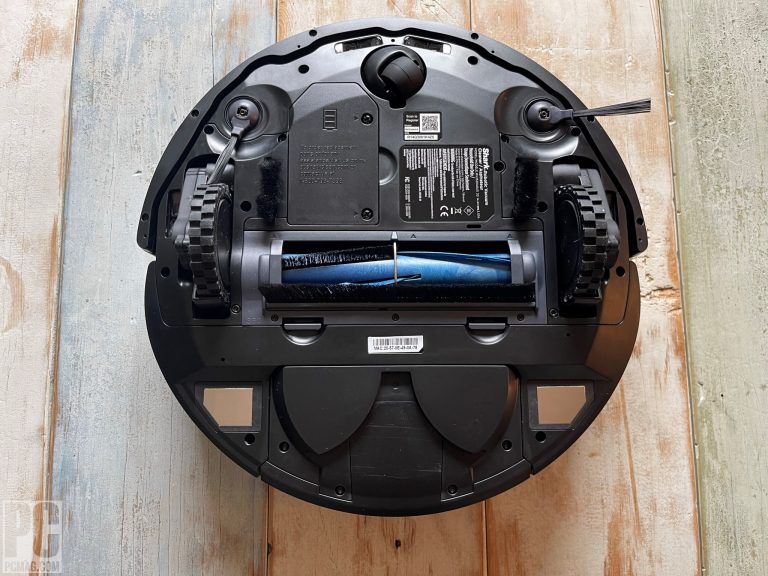
- Unscrew the four screws that secure the bottom plate to the rest of the unit using a Phillips screwdriver
- Lift off the bottom plate to access the brushroll assembly, located in front of the suction motor
- Pull on each end of the brushroll to remove it from its housing slots, then clean any debris or hair from both ends of the roller and from inside the housing slots
- Reassemble all parts in reverse order

Credit: www.vacuumtester.com
How Do You Take Apart a Shark Robot Vacuum Cleaner?
If you need to take apart your shark robot vacuum cleaner, there are a few things you’ll need to do. First, unplug the vacuum and remove the battery. Next, locate the screws that hold the housing together and remove them.
Be careful when doing this, as you don’t want to damage any of the components inside. Once the housing is removed, you should be able to see all of the internal parts of the vacuum. To start taking it apart, begin by removing the dustbin.
This is usually attached with a few screws or clips. With the dustbin out of the way, you can then move on to removing other parts like the roller brush and motor assembly. Again, there will be screws holding these in place so make sure to remove them before proceeding.
Once all of these parts are taken out, you should have full access to the internals of your shark robot vacuum cleaner. From here, it’s simply a matter of cleaning out any dirt or debris that may have accumulated inside. Pay special attention to areas like the sensors and brushes as these can get clogged up pretty easily.
Once everything is clean, reassemble your vacuum following the reverse order of disassembly and you’re good to go.
How Do You Remove the Bumper from a Shark Robot Vacuum?
If you need to remove the bumper from your Shark robot vacuum, follow these steps:
1. Unplug the vacuum from the power outlet and lay it down on a flat surface.
2. Locate the two screws that hold the bumper in place (one on each side).
3. Use a Phillips head screwdriver to remove the screws.
4. Carefully lift off the bumper and set it aside. Be careful not to lose the screws.
How Do You Clean the Sensors on Shark Robot?
If your Shark robot is having trouble detecting dirt and debris, it may be time to clean the sensors. Here’s how:
1. Unplug the Shark robot from its power source.
2. Use a dry, soft cloth to gently wipe the sensors clean. Be careful not to damage the delicate sensing equipment.
3. If there is stubborn dirt or debris on the sensors, you can use a cotton swab dipped in rubbing alcohol to remove it.
Again, take care not to damage the sensors.
4. Once the sensors are clean, plug the Shark robot back in and resume normal operation.
What Do You Do When a Shark Robot Gets Stuck?
If you’re lucky enough to have a shark robot, chances are you’ll never have to worry about it getting stuck. But just in case, here’s what to do:
1. Check the batteries.
If they’re low, charge them up or replace them.
2. Clear any debris that may be blocking the shark’s path.
3. Make sure the remote is working properly and within range.
4. If all else fails, reset the shark robot by pressing and holding the power button for 5 seconds.
Shark IQ 1001 series robot vacuum cleaner tear down video
Disassemble Shark Iq Robot
If you’re looking to clean your house and don’t want to lift a finger, the Shark Iq Robot is the perfect solution. But what happens when it’s time to clean the Shark Iq Robot itself? Here’s a detailed guide on how to disassemble your Shark Iq Robot so you can give it a thorough cleaning.
First, start by removing the dust bin. To do this, simply press the release button on the back of the unit and pull out the dust bin. Next, remove the roller brush by pressing down on the yellow tabs on either side of the brush and pulling up.
With those two parts removed, you’ll have full access to all of the nooks and crannies of your Shark Iq Robot where dirt and debris can hide. Use a vacuum with an attachment or a soft-bristled brush to gently remove any build-up in these areas.
To reassemble your Shark Iq Robot, start by snapping the roller brush back into place.
Then, insert the dust bin into its slot on the back of the unit until it clicks into place. That’s it! Your Shark Iq Robot is now ready to get back to work cleaning your home hands-free.
How to Clean Shark Robot Vacuum
If you have a Shark robot vacuum, you know that it is one of the best ways to keep your floors clean. But, like all vacuums, it does need to be cleaned from time to time. Here is how to clean your Shark robot vacuum:
1. Unplug the vacuum and remove the dustbin.
2. Tap the dustbin on a hard surface to release any debris that may be stuck inside.
3. Use a soft brush or cloth to wipe down the inside of the dustbin.
Be sure to get in all of the nooks and crannies.
4. Empty the dustbin and rinse with warm water if it is especially dirty. Allow it to air dry completely before putting it back on the vacuum.
5. Wipe down the outside of the vacuum with a damp cloth as needed. Avoid getting moisture in any openings on the vacuum.
Shark Iq Robot Vacuum Problems
Are you having trouble with your Shark IQ Robot vacuum? If so, you’re not alone. Many people have been reporting problems with their vacuums, and it’s becoming a major issue.
There are a few different problems that have been reported. One is that the vacuum doesn’t seem to be suctioning properly. This can be a big problem, as it means that your vacuum isn’t doing its job properly.
Another problem that has been reported is that the brushes on the vacuum aren’t spinning. This can also be a big issue, as it means that your vacuum isn’t cleaning as effectively as it should be. Finally, some people have reported that their Shark IQ Robot vacuums are simply not working at all.
If you’re having any of these issues, there are a few things you can do to try and fix them. First, make sure that you’ve emptied the dustbin and check for any blockages in the brush area. If there are none, then try resetting your vacuum by pressing and holding the power button for 30 seconds.
If this doesn’t work, then you may need to contact Shark customer service for further assistance. In conclusion, if you’re having trouble with your Shark IQ Robot vacuum, don’t despair. There are ways to fix most of the common issues that have been reported.
And if all else fails, remember that you can always contact Shark customer service for help.
Shark Robot Vacuum Suction Motor Not Working
If your Shark vacuum’s suction motor isn’t working, it’s a big problem. The suction motor is responsible for creating the powerful suction that allows the vacuum to clean carpets and floors. Without it, the vacuum is essentially useless.
There are a few things that could be causing the problem. First, check to make sure that the vacuum is plugged in correctly and that there is power reaching the outlet. Next, check the vacuum’s filters to see if they are dirty or clogged.
If they are, clean or replace them as needed.
If neither of those solutions solves the problem, then it’s likely that the suction motor itself is defective and will need to be replaced. This is a fairly complex repair that should only be attempted by someone with experience working on small electrical motors.
If you’re not comfortable doing this yourself, take the vacuum to a qualified repair person or contact Shark customer service for assistance.
Shark Robot Vacuum Clean Sensors
Are you tired of constantly having to vacuum your floors? Well, now there’s a solution – the Shark Robot Vacuum Cleaner! This little machine is specifically designed to clean your floors for you, so you can finally put your feet up and relax.
But how does it work, you might ask? Well, the Shark Robot Vacuum Cleaner is equipped with special sensors that allow it to navigate around your home and identify areas that need to be cleaned. Once it has identified a dirty area, the vacuum will automatically start cleaning it for you.
And because it’s autonomous, you don’t even have to be home for it to do its job!
So if you’re looking for a hassle-free way to keep your floors clean, then the Shark Robot Vacuum Cleaner is definitely worth considering.
Shark Robot Vacuum Repair near Me
If your Shark robot vacuum isn’t working properly, you may be wondering where you can go for repair services. Luckily, there are several options for Shark robot vacuum repair near me. One option is to contact the manufacturer directly.
Shark has a customer service line that you can call for troubleshooting and repairs. They may be able to help you fix the problem over the phone or they may direct you to a local service center. Another option is to take your Shark robot vacuum to a local vacuum repair shop.
Many of these shops are familiar with Shark vacuums and will likely have parts on hand if yours needs repaired or replaced. Be sure to call around and compare prices before selecting a shop so that you get the best deal possible. Finally, if you’re handy with tools, you could attempt to fix the problem yourself.
There are many online resources available that can walk you through common vacuum repairs step-by-step. However, unless you’re confident in your abilities, it’s probably best to leave this one to the professionals.
Shark Robot Vacuum Water Damage
If your Shark robot vacuum comes into contact with water, it could be at risk for sustaining water damage. While the Shark is designed to be durable, any type of exposure to water can potentially cause problems. If you think your Shark has come into contact with water, it’s important to take action right away in order to minimize the potential for damage.
Here are a few things you should do if you think your Shark has been exposed to water:
1. Unplug the vacuum from its power source and remove the battery (if applicable).
2. Inspect the vacuum for any visible signs of damage.
Pay close attention to the electrical components and look for any sign of corrosion or moisture.
3. If there is any evidence of moisture or corrosion, do not attempt to repair the vacuum yourself. Instead, take it to a qualified service center for repairs.
4. Allow the vacuum to completely dry out before attempting to use it again. This could take several days depending on the severity of the exposure. By taking these steps, you can help ensure that your Shark doesn’t suffer permanent damage from exposure to water.
How to Clean Shark Rv1001Ae
If you own a Shark Rv1001Ae, then you know how important it is to keep it clean. Not only does it look better when it’s clean, but it also helps to prolong the life of your vacuum. Here are some tips on how to keep your Shark Rv1001Ae looking and working its best:
1. Empty the dustbin after each use. This is probably the most important thing you can do to keep your Shark Rv1001Ae in good condition. The dustbin should be emptied after each use, or at least every other use.
2. Clean the filters regularly. The filters on your Shark Rv1001Ae need to be cleaned on a regular basis in order to prevent them from becoming clogged with dirt and debris. You can clean the filters by removing them from the vacuum and rinsing them in warm water.
Allow them to air dry completely before putting them back into the vacuum.
3. Clean the brush rollers as needed. The brush rollers on your Shark Rv1001Ae can become clogged with hair and dirt over time.
When this happens, they won’t be able to spin as freely and won’t be as effective at cleaning your floors. To clean the brush rollers, remove them from the vacuum and rinse them off in warm water.
Conclusion
The Shark Robot Vacuum is a powerful and versatile cleaning tool that can make short work of even the most stubborn dirt and debris. However, like any other appliance, it will eventually need to be taken apart for cleaning or repair. Fortunately, taking apart the Shark Robot Vacuum is a relatively simple task that can be easily accomplished with a few basic tools. With a little patience and careful disassembly, you can have your Shark Robot Vacuum looking and working like new.