How to Clean Filter on Dyson Handheld Vacuum?
Cleaning the filter on your Dyson handheld vacuum is essential for its efficiency and longevity. Not only does cleaning the filter help to keep dust, dirt, and other debris from building up in your machine but it also helps to improve suction power as well. A clogged filter can make a huge difference when it comes to how effectively your vacuum works and can greatly reduce its lifespan if not taken care of properly.
Fortunately, cleaning the filter on a Dyson handheld vacuum isn’t that difficult of a job; all you need are some basic supplies like gloves, rags or paper towels, and an air compressor (or shop vac). In this blog post we will walk you through step-by-step instructions on how to clean the filter on your Dyson handheld vacuum in order to ensure optimum performance.
- Power Off: Before you start cleaning the filter, make sure to power off the handheld vacuum and disconnect it from any electrical outlets
- Remove Filter Cover: Once powered off, remove the filter cover by pressing down on the tab located at its base and sliding it away from the vacuum body
- Gently Peel Out Filter: Carefully peel out the filter with your fingers or a pair of tweezers if necessary, taking care not to damage it in any way during removal
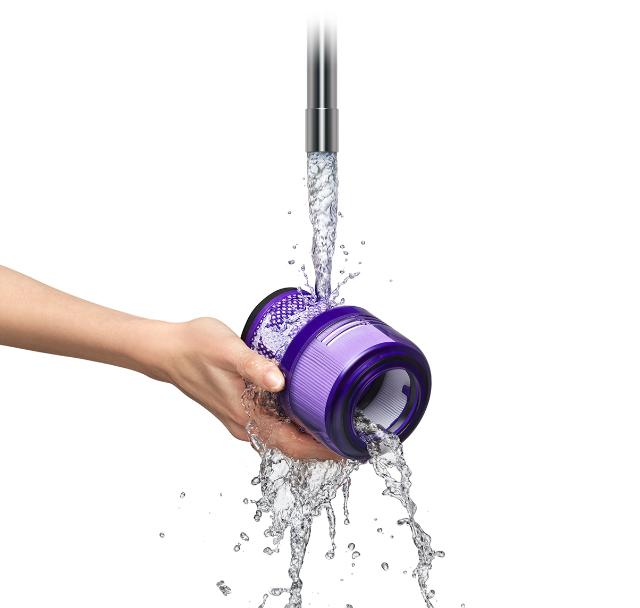
- Rinse Clean with Water & Soap: Place your filter in a basin filled with warm water mixed with dishwashing liquid and let sit for 10-15 minutes before rinsing thoroughly under cold running water until all soap is removed completely (do not use hot water)
- Air Dry Thoroughly: After rinsing, lay your clean filter flat on an absorbent towel and allow to air dry for at least 24 hours before putting back into place inside your Dyson Handheld Vacuum
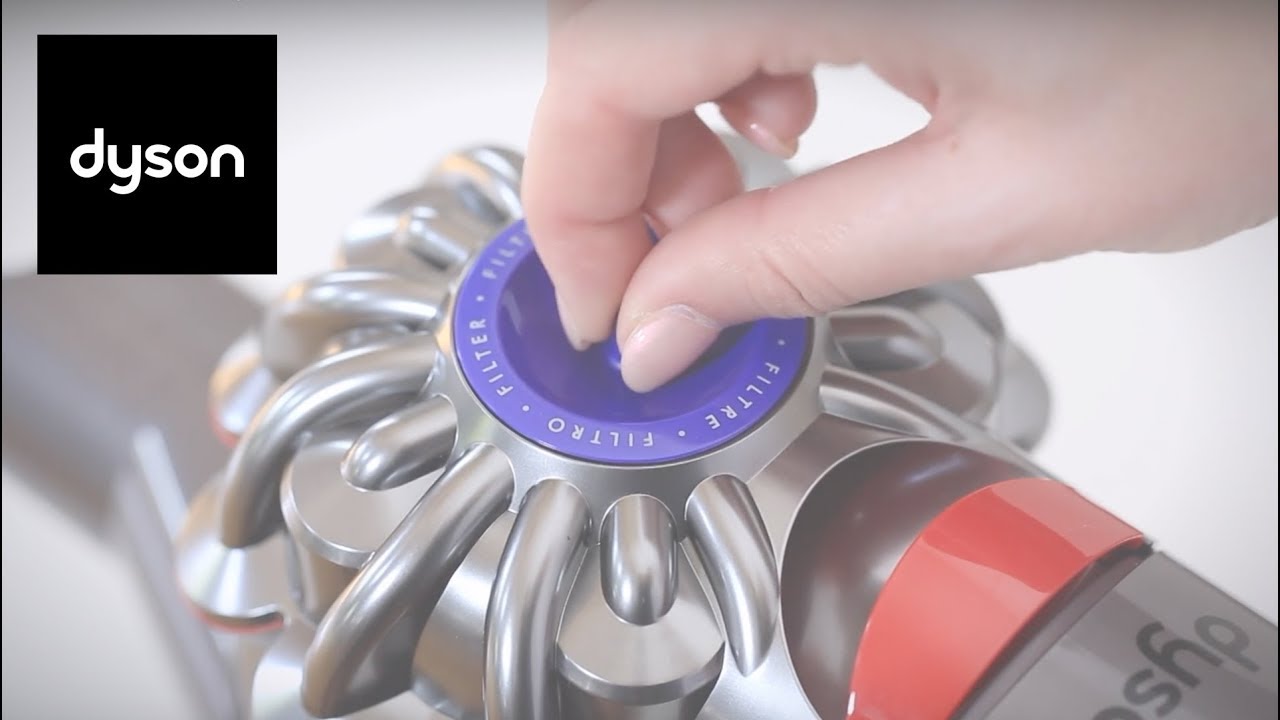
How to clean your Dyson V8™ cordless vacuum’s filters
How Do You Clean a Handheld Vacuum Filter?
Cleaning a handheld vacuum filter is an important part of maintaining your vacuum cleaner. A dirty or clogged filter can reduce the suction power of your machine and cause it to run inefficiently, resulting in poor cleaning performance. Fortunately, with a few simple steps you can easily keep your vacuum’s filter clean and running like new.
First, start by removing the filter from the handheld vacuums dust compartment. If there’s any visible dirt on the surface of the filter use a soft brush to remove as much as possible before proceeding with further cleaning methods. After that, immerse the filter into warm water mixed with mild detergent for approximately 10 minutes.
This will help loosen any stubborn particles stuck inside it which you may not be able to get at with just brushing alone. Afterwards use a soft cloth or sponge to scrub away any debris still left behind on its surface; making sure not to damage or deform its structure in anyway during this process. Once all residue has been removed rinse off thoroughly under tap water until no soap remnants remain before letting it air dry completely overnight – preferably laying flat on some paper towels so that both sides are exposed equally while drying out evenly (this should take around 8-12 hours).
Once fully dried out reassemble everything back together again and check if there’s any blockage within its hose before putting it back into service for another round of deep cleaning sessions! By following these easy steps regularly you’ll be able to keep your handheld vacuums filters working correctly and efficiently for years without having them replaced prematurely due to excessive build up over time – saving yourself both money & time in return.
How Do I Remove the Filter from My Dyson Handheld?
If you own a Dyson handheld vacuum cleaner, you may have noticed that the filter can become clogged with dirt and dust over time. This can reduce suction power and make cleaning more difficult. Fortunately, it’s easy to remove the filter from your Dyson handheld so you can clean or replace it as needed.
The first step is to turn off the vacuum cleaner and disconnect it from any power source. Once powered down, locate the lever on your machine which releases the filter compartment cover located at the rear of your machine near where you plug in for charging. Depress this lever while pulling open the cover with one hand and remove the filters gently with another hand.
To avoid damage to yourself or others, be sure not to touch any moving parts when removing these components. Once removed, inspect each component carefully before proceeding further by checking for dents or other signs of wear & tear that could impact performance before re-installing them back into your machine later on. If there is visible damage then consider replacing these items instead of simply reinstalling them back into your device – failure to do so could result in reduced functionality or even serious injury if used improperly.
If everything looks good then proceed to cleaning each part individually using either warm water & soap solution (for fabric filters) or compressed air (for foam/pleated ones). Make sure not leave out any crevices during this process as they are usually what holds most dirt particles together inside these components! After all parts have been cleaned separately put them back into their respective slots within your machine in order – starting from larger pieces such as pleated paper filters followed by smaller ones like carbon-activated ones lastly -and finally close up once again its compartment door securely making sure all fasteners are properly tightened afterwards too.
Finally switch on power again double check settings before resuming normal usage activities once more -you now know how simple yet effective maintenance procedure works here when comes time remove those pesky Dyson handheld Vacuum Cleaner Filters every now again.
Can I Clean the Filter on My Dyson Vacuum?
If you own a Dyson vacuum, chances are that at some point you will have to clean the filter. Cleaning your vacuum filter is an important part of maintaining it and keeping it running efficiently. Fortunately, most Dyson vacuums come with easy-to-follow instructions on how to do this properly.
To begin cleaning the filter, first you must remove it from the machine. Depending on your model of Dyson Vacuum, this can usually be done by pressing a button or lever near where the filter is located in order to release it from its housing. Once removed, carefully inspect the filter to ensure there are no large chunks of debris or dirt clogged around or within it before proceeding with any further steps.
Once inspected and cleared of any large debris particles, take your cleaned filter outdoors away from your home and use compressed air (such as canned air) to blow out any remaining dust particles stuck in between fibers of the material. If using canned air isn’t available for whatever reason then simply tap lightly against a surface such as wood or metal in order to dislodge trapped dust particles which may be difficult for compressed air alone to reach into small crevices/areas within and around the filters body itself..
After tapping or blowing out all excess dust particles off your now cleaned vacuum filter, place back into its respective housing within your machine while adhering strictly according manufacturer guidelines outlined previously when initially removing said item so as not damage its integrity during reinsertion process itself – once completed securely fasten if necessary via screw(s), snap-in device etcetera depending on exact make/model being used prior continuing operation again as normal upon completion thereof . Congratulations! You have successfully managed clean & effectively maintained one more component found inside modern day technology marvel otherwise known today commonly referred “Dyson Vacuum” .
How Do You Clean a Dyson Hand Held Head?
If you have a Dyson hand-held head, you know how quickly it can accumulate dirt and dust. Fortunately, cleaning your Dyson is easy to do and doesn’t require too much effort. Here are some tips for properly cleaning your Dyson hand-held head:
1. Start by removing the filter from the machine and placing it in a bowl of warm soapy water. Let it soak for about 30 minutes before rinsing off with cold water and setting aside to dry completely before replacing into the machine.
2. Once the filter is removed, use a vacuum cleaner or brush attachment on your regular vacuum cleaner to remove any debris or dust particles stuck between crevices in the handle of the toolhead itself – this helps prevent clogs when using at full power later on.
3. Next up comes actually washing the exterior of your toolhead – take an old soft cloth dampened with warm soapy water (mild detergent) and gently scrub away any grime that has built up over time on both plastic surfaces as well as metal ones if present (the latter may require more vigorous scrubbing). Make sure not to submerge any part of your toolhead in liquid during this process – just lightly wipe down all areas until clean.
4. Rinse off soap residue with cold water afterwards then set aside somewhere safe where air circulation will help ensure proper drying takes place prior to its next usage session; alternatively, you could also opt for blowing out excess moisture from within its nooks & crannies through compressed air cans available at most hardware stores should need be but be aware that doing so could potentially damage delicate components inside if done incorrectly/too forcefully.
5. Once everything else has been taken care of don’t forget about checking/replacing worn out parts such as filters which should ideally be changed every 3 months depending upon usage patterns (more often if used frequently). To do this simply detach them according instructions provided by manufacturer’s manual located either online or inside box packaging accompanying product purchase originally made – replace accordingly making sure they fit snugly back onto unit without forcing anything into place otherwise problems might arise further down line due incorrect installation leading potential breakdowns occurring far sooner than expected…be mindful never leave these task unattended as neglecting what needs doing now could end costing more later down road than initially anticipated.
Credit: www.dyson.com
How to Clean Dyson Animal Filter
If you own a Dyson Animal vacuum cleaner, then you know how important it is to keep the filter clean. The filter helps remove dust and allergens from your home’s air, so maintaining it is essential for the health of your family. Fortunately, cleaning a Dyson Animal filter isn’t difficult – all you need are a few simple tools and supplies.
To begin, unplug your vacuum cleaner and remove the canister unit. You should see two parts: the cyclone assembly (which houses the dirt) and the post-motor filter (the part responsible for capturing microscopic particles). To access this component, press down on both sides of its casing until it pops open.
Then carefully pull out the post-motor filter from inside. Next, tap or shake off any excess dirt that may be clinging to the outer edges of your post-motor filter before moving onto step three – washing! Place your dirty post-motor filter into a bucket filled with warm water mixed with liquid detergent or dish soap (not powder detergents), using either a sponge or brush to scrub away stubborn grime if necessary.
When finished washing, rinse off all residue in cold water to ensure no soapy suds remain on its surface area as this could damage its function upon reassembly back into place later on. Finally, allow enough time for complete drying by laying flat over newspaper outdoors in direct sunlight – typically takes 1 day depending on weather conditions/humidity levels outside.
Once fully dry from top to bottom without dampness present anywhere else besides visible paper towel absorption spots taken up during initial wiping afterwards…reassemble back together again following original steps provided above but reversed order instead now & voila.
Conclusion
Regular filter care keeps strong suction and fresh airflow in a Dyson handheld vacuum. Remove the filter, tap out dust, rinse under cool water, and let it dry fully before reinstalling. This routine protects the motor, boosts pickup on crumbs and pet hair, and reduces odors. Clean habits also extend runtime and keep noise low.
A quick check after heavy use maintains peak results and saves time. Consistent cleaning supports reliable performance and helps the Dyson handheld vacuum deliver crisp, efficient cleaning every day for homes, cars, and daily messes.