How to Put Together Libman Dust Mop?
To put together a Libman dust mop, you will need the following items: dust mop head, pole handle, and two parts of the connector. Begin by attaching one part of the connector to the top of the pole handle. Then slide on the dust mop head with its looped end into this same part of the connector until it clicks in place.
The other part of the connector should then be attached to bottom side of the dust mop head. Attach this second piece into place at an angle towards you so that when placed onto a flat surface both pieces are touching each other completely. Your Libman Dust Mop is now assembled and ready for use.
- Step 1: Gather the Parts – Before you begin, make sure that your Libman dust mop kit includes all of the necessary parts
- This should include a mop handle and frame with connecting pieces, a microfiber mop head, and any additional tools needed for assembly
- Step 2: Assemble the Handle – Begin by attaching the handle to the frame
- To do this, simply insert one end of the handle into one of its holes on either side of the frame until it clicks into place
- Then slide in an included connector piece to lock it securely in place
- Step 3: Insert Mop Head – Once your handle is assembled onto your frame, lay out your mop head flat on a table or other surface with its velcro strips facing up
- Place your entire dust mop onto this surface so that each end overlaps both sides of the velcro strips and press firmly down to ensure they are properly connected together
- Step 4: Secure Connectors & Attachments – The last step is to secure any additional connectors or attachments as specified in your user manual (e
- , screws) ensuring that everything is tightly fastened together before use!
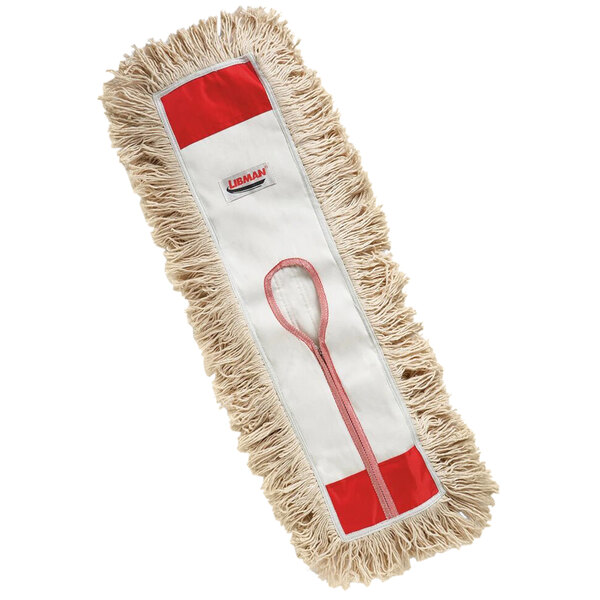
Credit: www.webstaurantstore.com
How Do You Put a Libman Mop Back Together?
Putting a Libman mop back together is easy and can be done in no time. First, you need to attach the handle to the mop head. You will find two small slots on either side of the mop head which align with two small metal clips at the end of the handle.
Place each clip into its respective slot and push down until it clicks securely into place. Next, you will need to slide your replacement mop cover onto your mop base by inserting one tab of the cover into its designated slot near where your handle is attached. Once both tabs are in their corresponding slots, pull down gently on one side of the cover until it snaps securely in place over your mopping surface.
Take a cloth or damp sponge and wipe down all surfaces that came in contact with soap or water during cleaning so that nothing remains stuck underneath your new clean mop cover! With these simple steps, you can get your Libman Mop back up and running again quickly.
How Do You Reassemble a Libman Mop Head?
Reassembling a Libman mop head is easy if you follow the right steps. First, make sure to separate the mop handle and the mop head for easier reassembly. Next, grab both ends of the mop head and hold them together firmly with your hands.
Then take one end of the mop head thread it through one side of its handle opening. Do this until you have threaded all four sides of your handle onto its corresponding corners in the same way as before. Finally, secure each corner by pushing down on them with your fingers to ensure they are tightly secured in their place while also ensuring that they fit snugly into place when pulled back up again.
How Do You Set Up a Dust Mop?
Setting up a dust mop is an important part of regular household cleaning. Before you can start using your dust mop, you need to make sure that it’s properly set up and ready to go. Here are the steps for setting up a dust mop: First, select the correct size of head for your needs – smaller heads work well in tight spaces while larger heads provide better coverage on hard floors.
Second, attach the handle firmly to the head of the mop so that it won’t come loose during use. Third, choose a good quality microfiber or cotton pad for maximum absorbency and durability. Fourth, dampen the pad with water before use and wring out any excess liquid; this will help attract dirt particles more effectively than when dry.
Attach the pad securely onto the head of your dust mop using either velcro straps or clips depending on what type you have and begin mopping! With just these few simple steps, you should be all set to give your home a thorough clean with minimal effort.
How Do You Remove a Libman Dust Mop Head?
To remove a Libman dust mop head, begin by turning the mop handle upside-down. Then locate the metal clips on either side of the mop head and press them inwards to unlock the fastening mechanism. Once unlocked, you can then carefully lift up on one side of the mop head until it releases from its housing.
If necessary, use a screwdriver to pry off any stuck parts that may be preventing removal. After removing your old Libman dust mop head, replace it with a new one by firmly pressing down around all edges of the replacement part until you hear an audible click indicating that it is locked into place securely.
Libman Microfiber Dust Mop Refill Instructions
Libman Microfiber Dust Mop Handle Came off
If the handle of your Libman Microfiber Dust Mop has come off, don’t worry – this is a common issue and can be easily fixed. To reattach the handle, simply locate the two metal pins on either end of the mop head and slide them back into place in their corresponding slots located at either side of the mop handle. Once you’ve done that, press firmly on both sides to secure it in place.
Conclusion
The Libman dust mop is an easy tool to use for daily cleaning and maintenance. It’s lightweight design allows it to be maneuvered easily, while its microfiber strands pick up dirt and debris from most surfaces. With minimal assembly required, the dust mop can be used quickly and efficiently in both professional and residential settings.