How to Clean Filter on Shark Handheld Vacuum
Cleaning the filter on a Shark Handheld Vacuum is an important maintenance task to keep it functioning optimally. Doing so will ensure that the vacuum sucks up dirt and debris efficiently, as clogged filters can lead to poor suction or even cause damage to your appliance. Luckily, cleaning the filter isn’t hard and only takes a few minutes of your time.
This guide will walk you through how to clean a Shark Handheld Vacuum’s filter in just four easy steps. Before beginning, make sure you have all necessary items: gloves (if desired), trash bag for disposing of accumulated dust and lint, vacuum cleaner manual/instructions (for reference), replacement parts if needed (depending on model). Once you have everything ready, it’s time to start cleaning!
How to maintain the Shark ION™ W1 Cordless Handheld Vacuum
- Step 1: Turn off the vacuum and unplug it from the electrical outlet
- Remove the dust cup by pressing down on the release button located on top of the handle
- Step 2: Remove any debris from inside the dust cup with a stick or brush, then rinse it out with warm water until all dirt has been removed
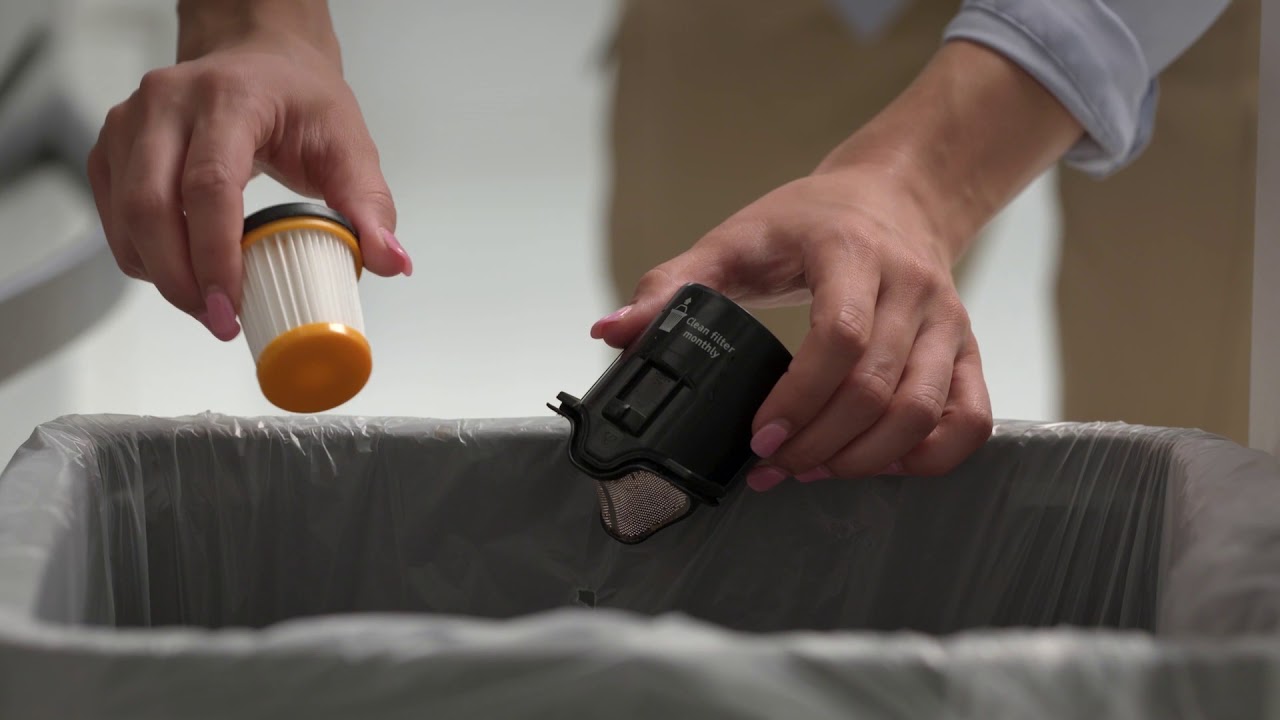
- Step 3: Take out the filter located inside the dust cup chamber and clean it using a soft cloth and warm water
- Gently scrub away any dirt that may be stuck to its surface
- Allow it to air dry before replacing back into its chamber in your Shark handheld vacuum cleaner
- Step 4: Once you have put everything back together, plug in your Shark Handheld Vacuum Cleaner and turn it on to test if everything is working properly again!
Credit: www.lowes.com
Can You Wash Shark Handheld Filters?
When it comes to maintaining your Shark handheld vacuum, one of the most important things you can do is clean the filter. With proper care and maintenance, a Shark handheld filter can last up to two years – but only if you take the time to clean it regularly.
So, when it comes down to it: Can you wash Shark handheld filters?
The answer is yes! In fact, cleaning your Shark handheld filter is an essential part of maintaining its performance and longevity. Fortunately for owners of a Shark Hand Vacuum Cleaner, cleaning their filters isn’t as daunting a task as some might think.
To start off with washing your Shark handheld filter, make sure that it’s completely disconnected from any power source before beginning this process. Once disconnected and cooled down (if recently used), remove the filter carefully by pressing on either side tab located near where the handle connects with the body of the machine; these tabs will allow easy access to removal without damaging any other parts connected to or surrounding your filter. As soon as you have removed your filter gently shake away all dust particles collected inside before proceeding further into more detailed cleaning methods such as rinsing or submerging in water.
Rinsing should be done using cold tap water only and taking extra precaution not to expose/soak any electrical components within which could potentially cause permanent damage if subjected to moisture over long periods of time or at higher temperatures than normal room temperature conditions; once completed simply leave out on paper towels overnight ensuring complete drying prior reinsertion back into place – please note that many people choose not use soap products during this process due filtration being compromised by detergents typically found in soaps which may reduce overall suction capabilities over prolonged usage times . Submerging should also be done using cold tap water only although there are specific brands available specifically designed for submerged cleaning however caution must still be taken regardless when dealing with electronic equipment parts involved within vacuums; after submerging for no longer than 10 minutes at most remove quickly keeping excess moisture away from internal electronics areas then dry thoroughly via papers towels again leaving outside until fully dry overnight just like previously mentioned above regarding rinsing methodologies – please note that both processes require utmost attention taken during each step otherwise potential damages may occur resulting in costly repair fees usually surpassing original costs related with purchasing new replacement units instead .
How Do I Clean My Shark Cordless Vacuum?
If you’re looking for an easy and effective way to clean your Shark cordless vacuum, look no further! Cleaning your cordless vacuum is essential in order to keep it functioning properly and extend its lifespan. Here are some quick tips on how to properly clean your Shark cordless vacuum.
First off, make sure the power switch is turned off before beginning any cleaning process. Then remove the dust cup from the unit by pressing the release button located near it. Then empty out all of the dirt and debris from inside of it into a trash can or bin.
After that, use a damp cloth or paper towel and gently wipe down both sides of the dust cup filter screen until all visible dirt has been removed from it.
Next, take out all removable parts such as filters, brushes, crevice tools etc., if applicable to your model of Shark cordless vacuum cleaner. Then rinse each part with warm water and mild soap solution then let them air-dry completely before reassembling them back into place in the appliance body itself.
It’s also recommended that you check for any clogged hoses inside the machine – these can easily be cleared using a nylon brush tool inserted through one end while blowing compressed air out through another end after removing both ends of hose connections at either side (if there are two). Once done with this step, put everything back together again making sure they fit snugly without any gaps between parts so as not to risk leakage when vacuuming later on down line!
Finally once done with assembling everything back together run several rounds over carpets/floor surfaces using various settings available depending which one suits best given type surface being cleaned at time – this helps ensure suction power remains optimal throughout entire cleaning session thus providing superior results every single time!
Additionally don’t forget about replacing filters periodically according manufacturer instructions too (usually every 3 months) so as not compromise overall performance quality over long term usage periods either – doing will help maintain full efficiency levels even after extended duration operations have been completed successfully without issues arising along journey!.
How Do I Clean My Shark Vacuum Pet Filter?
When it comes to vacuuming up pet hair, one of the most important pieces of equipment you need is a Shark vacuum with an efficient pet filter. Pet filters are designed specifically for picking up pet fur and dander, making them ideal for households that have pets. But like any other component in your cleaning arsenal, your pet filter needs regular maintenance and care to ensure it works optimally.
So how do you go about cleaning your Shark vacuum’s pet filter? Here’s what you need to know.
The first step is to make sure the power is off on the vacuum before attempting any maintenance or cleaning tasks.
Then turn the unit upside down so that you can access the dust cup and its components from underneath. Most Shark models come with two filters – a pre-motor foam filter and a post-motor felt filter – both of which require periodic replacement as well as regular cleanings for optimal performance.
For routine cleanings, start by removing both filters if they are removable on your model; some models may only allow you to remove one at a time while others will require removal of both simultaneously.
Be sure to note their positions so that when reinstalling them later they are properly oriented back into place in order for them work efficiently again once reinserted into position within the dust cup area beneath the motor housing base plate assembly after cleanup activities have concluded (if available).
Next, take each individual filter outside or over a sink or bucket filled with warm water and use mild soap (like dishwashing liquid) along with soft bristled brush such as an old toothbrush or paintbrush cleaner tool – whichever is more readily available – to gently scrub away dirt particles from all surfaces without damaging delicate material fibers found within these specialized parts made specifically for animal debris collection purposes only! Make sure not to use anything too abrasive otherwise this could damage/tear apart delicate materials used during manufacturing process thereby reducing their effectiveness when filtering out airborne allergens produced by pets living inside home environment where filtration system should be focusing upon capturing those particular types pollutants instead!
How Do I Clean My Shark Ion Vacuum Filter?
When it comes to keeping your Shark ion vacuum running at its best, one of the most important parts is making sure that the filter is clean and in good working order. This simple task can help ensure that your vacuum will not only pick up dirt and debris more effectively, but also that it won’t be clogged with dust or other particles which could prevent efficient air flow. So if you’re wondering how to clean a Shark ion vacuum filter, read on for step-by-step instructions!
1. Start by unplugging the cord of your Shark ion vacuum and removing any attachments (if applicable). You’ll then want to locate the filter—this should be easy to find as there’s usually a warning label near it indicating what type of filter you have installed (HEPA or non-HEPA).
2. Once you’ve identified the correct filter, remove it from its housing by carefully pressing down on both sides while simultaneously pulling outwards—you may need some force depending on how long it’s been since this was last done.
3. After removing the filter, make sure all debris has been dislodged from its surface using either an old toothbrush or compressed air (available at most hardware stores). Be careful not to damage any part of the actual fabric material as this could impair filtration efficiency when reinserted into your machine later on.
4 .
Next up is washing away any stubborn dirt and grime: fill up a sink with warm water and add a few drops of liquid dish soap before immersing your filter inside for 5 minutes or so; use an old toothbrush once again here if necessary in order to give everything an extra scrubbing before rinsing off thoroughly under cold tap water afterwards.
5 . Finally dry off excess moisture by dabbing gently with a towel before allowing your now sparklingly clean filters ample time for fully drying out naturally overnight prior to reinstallation into their respective housings come morning time!
By following these steps regularly every 6 months or so – depending upon usage frequency – cleaning out Shark Ion Vacuum Filters will become second nature in no time!
Conclusion
If you have a Shark Handheld Vacuum, it’s important to keep the filter clean. Cleaning your filter can help improve the performance of your vacuum and ensure that dust particles don’t escape into the air. Here are some tips on how to best clean your Shark Handheld Vacuum’s filter:
First, remove the filter from the vacuum and give it a good shake over a trashcan or bucket. This will dislodge any dirt or debris that is stuck in its crevices. After shaking out all of the debris, use an old toothbrush or soft-bristled brush to gently scrub away any remaining dirt and dust.
Once you’re done scrubbing, rinse off the filter in warm water until all of the dirt has been removed and then allow it to dry completely before putting back into place in your vacuum cleaner.
Finally, if needed apply some light machine oil onto both sides of the cloth part of your filter (not near any motor components). Doing so helps prevent dust buildup on this part of your shark handheld vacuum’s filter while also improving its overall performance!