How to Clean a Dyson Handheld Vacuum?
Keeping your home clean and tidy can be a difficult task, especially when it comes to deep cleaning carpets and hard-to-reach areas. The Dyson handheld vacuum is an ideal tool for making this job easier. This powerful device has the capability of sucking up dirt and debris from any surface with ease, giving you a spotless finish in no time at all.
But keeping your Dyson running efficiently requires regular maintenance and cleaning. So if you’re looking for tips on how to clean a Dyson handheld vacuum, this blog post will provide some helpful advice. You’ll learn about the steps involved in dismantling and cleaning the different parts of the machine, as well as vacuuming techniques that can help keep it running optimally over time.
With these tips, you’ll be able to easily maintain your Dyson handheld so that it works perfectly every time.
- Empty the Dust Bin: Take the dust bin out of the vacuum and empty it into a trash can or bag
- Make sure to dispose of all debris properly
- Clean Out Debris: After removing all dirt, use a small brush to clean out any remaining debris from inside the dust bin and around other components of your vacuum cleaner
- Use a damp cloth to wipe away any excess dirt or dust particles that may be clinging on to crevices or edges in your device
- Clean Filter: Take out your filter and tap it against an open surface like a trash can lid or counter top until most of the dust is removed from its surface area
- If needed, you can lightly rinse off your filter with warm water but never submerge them in water as this will damage them permanently
- Clean Brush Rollers : Remove hair, lint , string, fibers etc from roller using tweezers
- Then use soft bristled brush for cleaning rollers carefully without damaging them
- Reassemble : Reassemble Dyson Handheld Vacuum after ensuring all parts are dry before plugging it back into power outlet for use again .
How to clean your Dyson V8™ cordless vacuum’s filters
How Do You Clean the Inside of a Dyson Stick Vacuum?
Cleaning the inside of a Dyson stick vacuum can be an important part of regular maintenance to ensure it runs efficiently. It’s also essential for removing dirt and dust particles from components like filters, brushes, and crevices. With some basic supplies and know-how you can keep your Dyson stick vac clean in no time!
Here are the steps you should follow when cleaning the inside of your Dyson Stick Vacuum:
1. Start by unplugging the vacuum from its power source. You don’t want any surprises while cleaning out all those tiny parts.
2. Remove any attachments or tools that may be attached to the wand or hose before beginning your clean-up routine. This will make it easier to access all areas without having to move these items around later on.
3. Check for clogs in the hose and wand attachment by running water through them with a garden hose if necessary—push as much air through them as possible too so everything is cleared out thoroughly.
If there are blockages, check for obstructions like hair or lint buildup before proceeding further into cleaning mode (especially if they could cause damage).
4. Get rid of dust build up on fans blades within motorized parts using a damp cloth or compressed air spray (if available). Make sure not to use anything abrasive that might scratch delicate surfaces during this process.
5 . Carefully remove any debris from filters and dust cups located at different points along the unit such as underneath brush rollers or near suction outlets – use tweezers where needed too! Don’t forget about checking fan grills which often collect bits over time – again gently wiping away anything stuck here with a soft cloth should do trick just fine but take caution not disturb their positioning too much during this step either way so nothing gets bent/moved around more than necessary otherwise performance will suffer accordingly afterwards – always good idea double check position after done here 🙂
6 . Finally once everything has been cleaned up properly reassemble all pieces back together according their original design layout & plug machine back into power source; turn switch ‘on’ test functionality making sure nothing seems off compared normal usage settings prior starting task today… success.
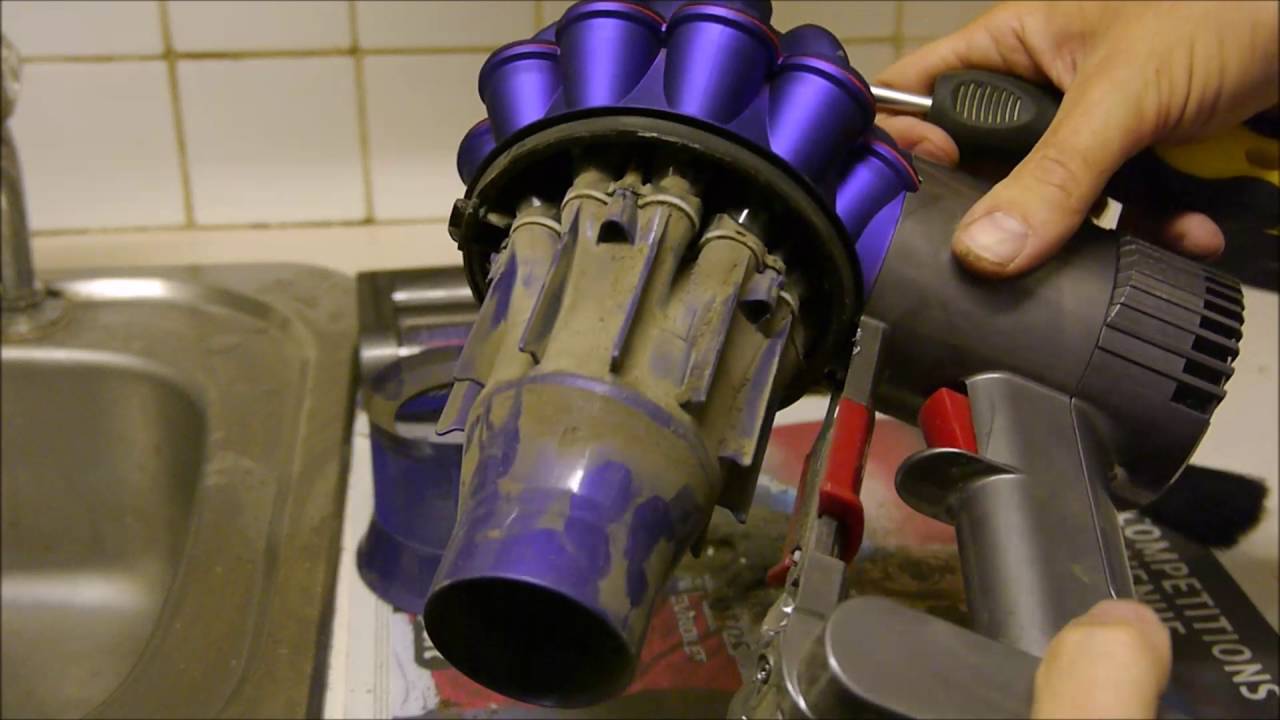
How Do You Take Apart a Dyson Handheld?
If you own a Dyson handheld vacuum cleaner, chances are you’re familiar with its convenience and power. But if something goes wrong or your device needs maintenance, it’s important to know how to take apart the unit for cleaning and repair. Luckily, taking apart a Dyson handheld is an easy process that can be done in just a few steps.
The first step is to remove the hose from the handle by pressing down on the release button located at the base of the handle and pulling outwards. This should pull out easily with no resistance once disengaged. Once removed, set aside all parts until reassembly is needed later on.
Next, take off both filters by unscrewing them counter-clockwise until they come off easily by hand. Then flip over your device so that it’s facing downwards towards you while holding onto it firmly with one hand as this will help keep everything steady during disassembly/reassembly processes further along in this tutorial. You now need to remove four screws located around where the filter was placed initially which hold together two separate pieces of plastic casing covering up some internal components such as motors and wiring harnesses etc..
Unscrew these using either a Philips head screwdriver (or appropriate tool) being careful not to strip any threads as this could cause problems when reassembling later on! Once removed, carefully lift away both pieces of plastic casings exposing more internal parts including various buttons like “Power On” switch etc…
These can then be gently disconnected from their respective ports using small pliers but please exercise caution when doing so; there may also be additional wires connected here too depending upon model type – again use caution here and disconnect them slowly without causing damage or breaking anything! Finally we have reached our last step: Removing The Power Pack Battery – Remove two screws situated near where we took off our filter earlier before lifting away gently yet firmly enough so not break any delicate connections underneath (such as those mentioned above). You should now see inside your battery compartment which contains several different wires running through it; undo each connection accordingly before finally unplugging from its source port at top center position within cavity itself.
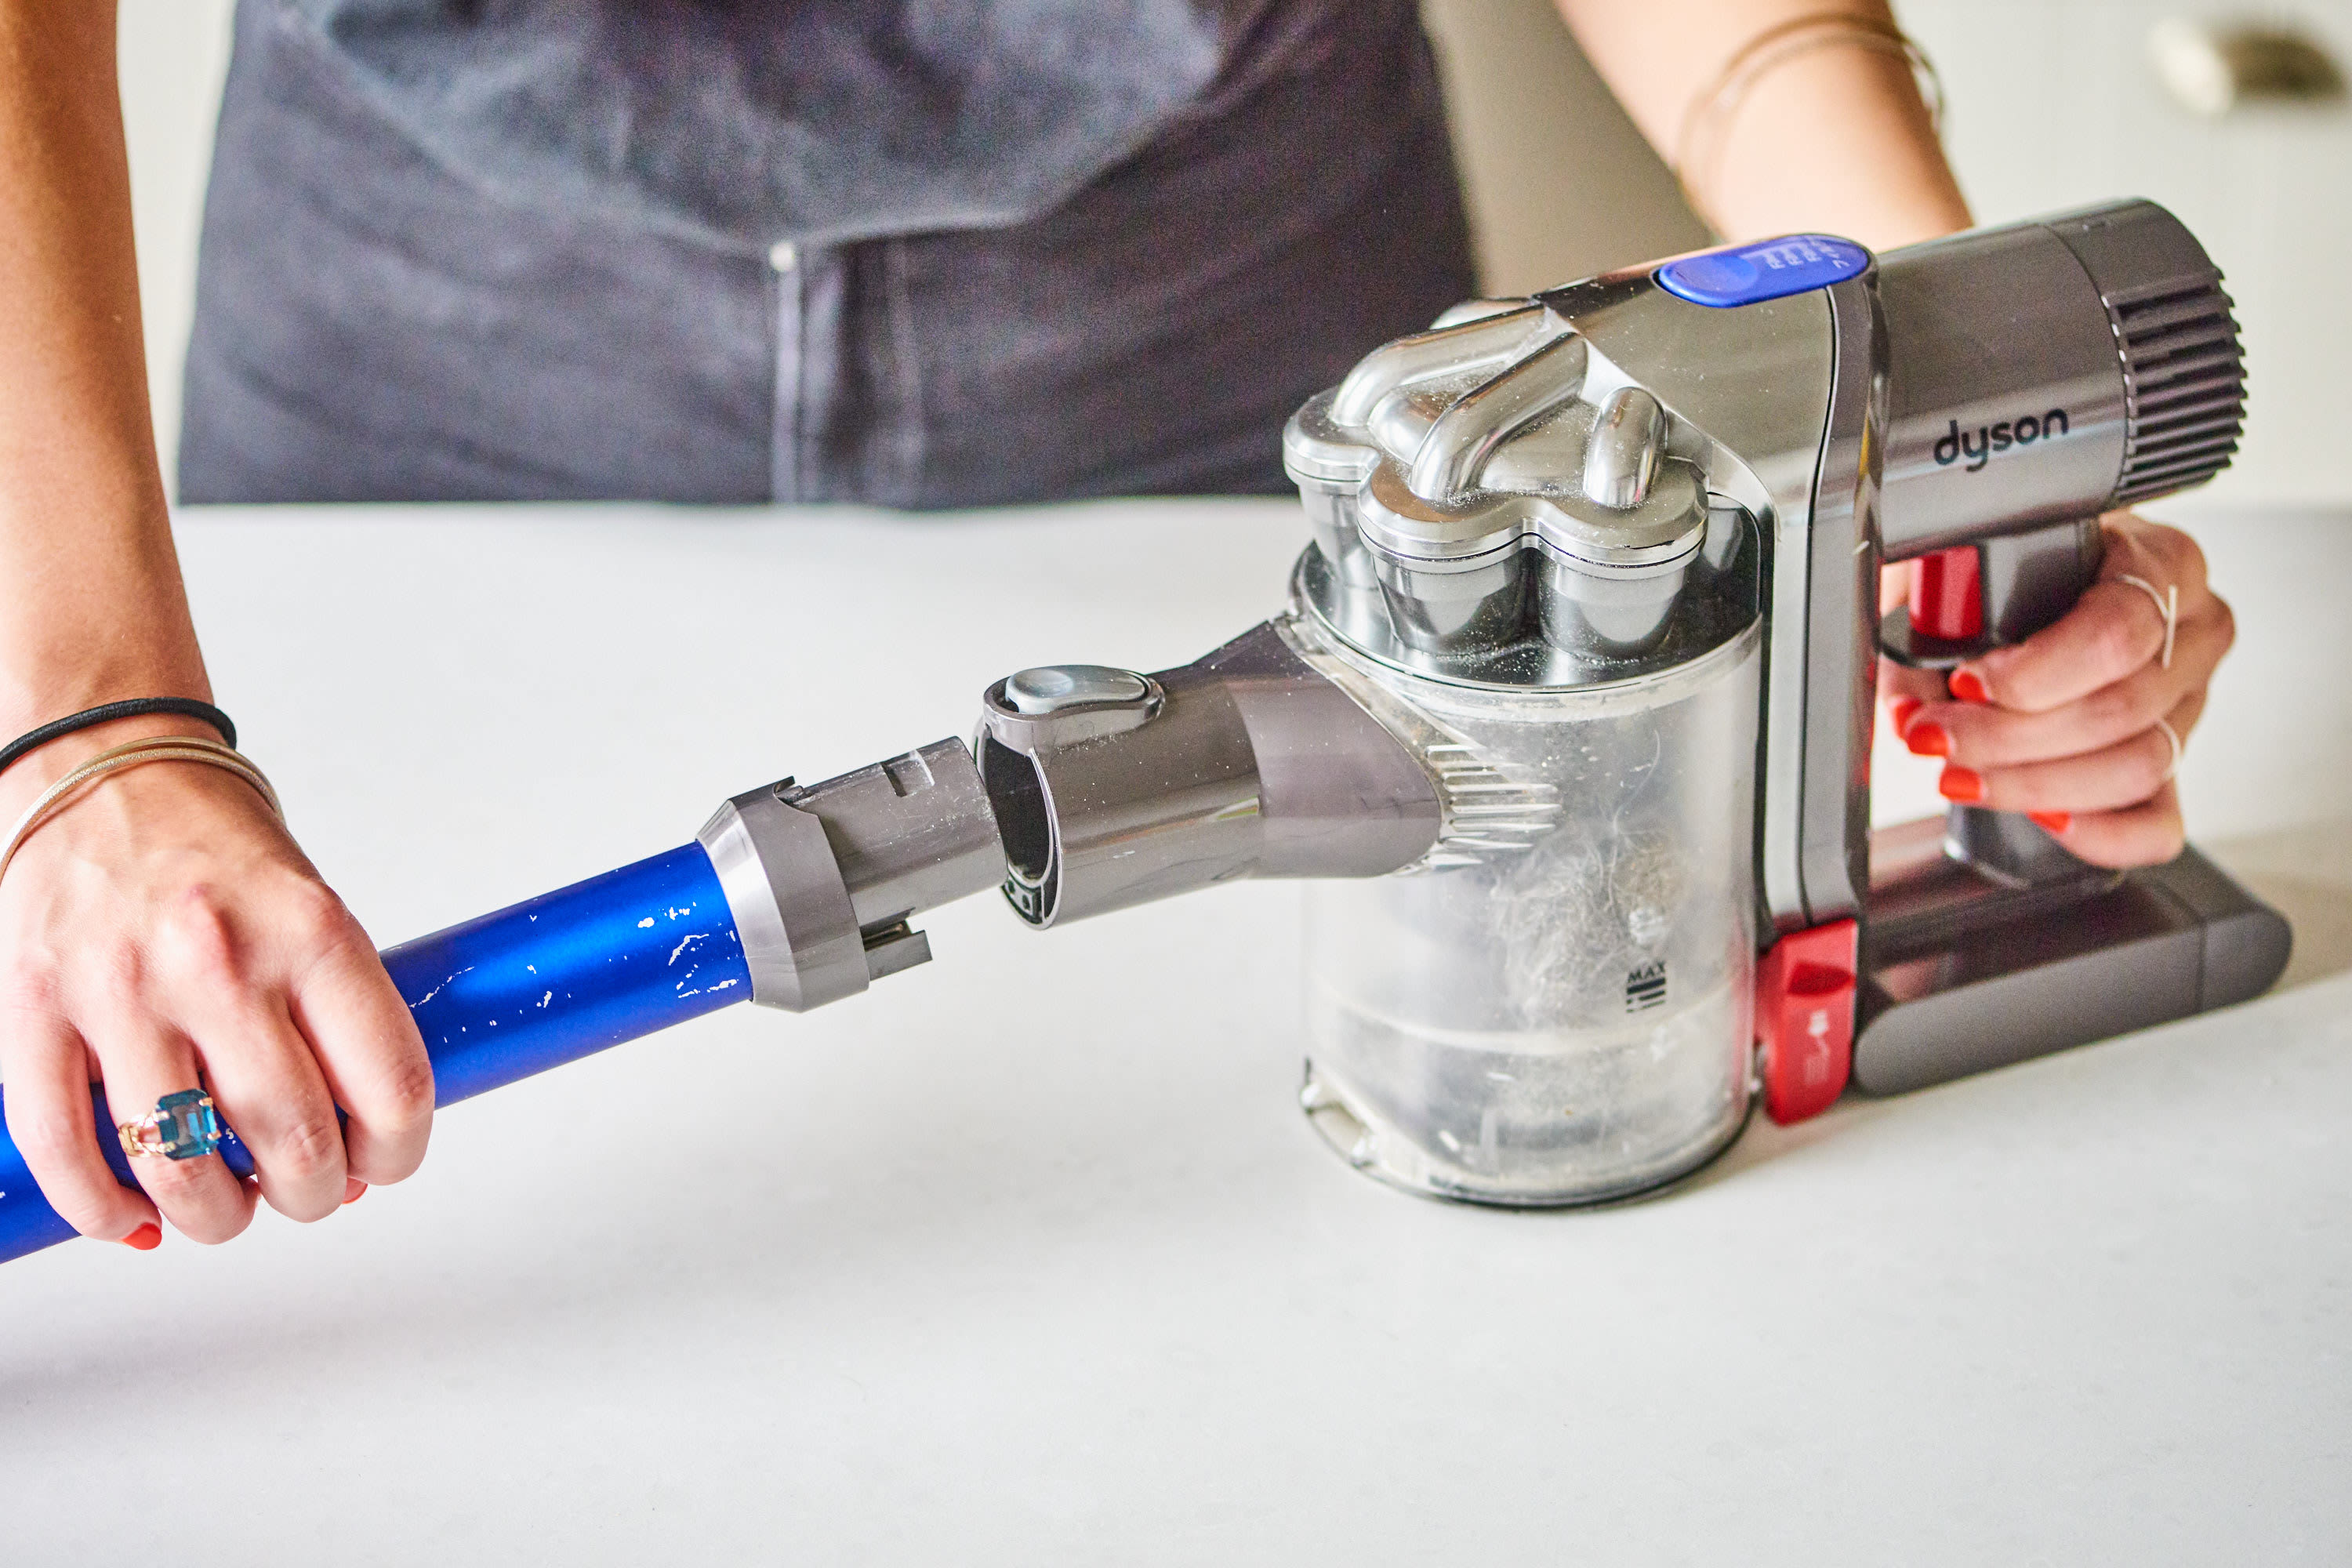
How Do You Clean a Dyson Hand Held Head?
When it comes to keeping your home clean, one of the most convenient tools you can use is a Dyson Hand Held Vacuum Head. This handheld device can easily be used for quick spot cleaning or even just vacuuming up small messes around the house. However, with its portability also comes the need for regular maintenance and cleaning in order to keep it functioning properly.
Here are some tips on how to properly clean a Dyson hand held head:
1. Remove any dirt or debris from the vacuum head by using a soft cloth and gently wiping away any particles that have accumulated on the surface. Make sure not to press too hard as this may damage certain components within the vacuum head itself.
2. Disconnect all attachments such as brushes, nozzles, etc., and remove them from the vacuum handle so they can be cleaned separately if needed.
3. Take off all filters located inside of the vacuum head and place them into lukewarm water mixed with mild detergent designed specifically for washing filters (do NOT use bleach). Let these soak for approximately 15-20 minutes before rinsing thoroughly under running tap water until clear of soap residue; then leave out overnight to completely dry before reattaching back onto your Dyson hand held head unit.
4. Empty out all dust bins located both inside and outside of your machine’s main body after each use in order to prevent build-up from occurring which could cause clogs within internal components over time if left unchecked regularly; simply emptying out when necessary should do wonders for preventing this issue altogether.
5 .For more stubborn stains/dirt buildup on external surfaces, mix together equal parts baking soda & vinegar into a paste-like consistency before applying directly onto affected areas using either an old toothbrush or soft rag—let sit for 5 minutes then wipe away with damp cloth afterwards so as not to scratch delicate plastic parts while doing so.
By following these simple steps outlined above you should have no problem maintaining your prized possession –the ever versatile & dependable Dyson Hand Held Vacuum Head–in pristine condition without much hassle at all.
Can You Take a Dyson Apart to Clean It?
If you own a Dyson vacuum cleaner, you may be wondering if it’s possible to take it apart and clean it yourself. The answer is yes—you can absolutely take your Dyson apart for cleaning! Here are some tips on how to do this safely and effectively:
1. Make sure that the power cord is unplugged from the wall outlet before beginning any work on your Dyson. This will prevent electrical shock or injury while working with its internal components.
2. Begin by removing all external parts of the vacuum cleaner such as hoses, brushes, filters, extension wands, etc., so that you can get access to the motor compartment.
Depending upon which model of Dyson you have, there may be screws holding these pieces in place; use a screwdriver to remove them if necessary.
3. Once all of these external pieces have been removed, locate and open up the motor housing (usually located near the bottom of your machine). Inside here are multiple small components which need to be cleaned regularly – like fan blades and airways – as well as larger parts like motors and bearings which should only be handled by experienced technicians due to their delicate nature (if unsure about what needs cleaning/servicing consult an authorized technician).
4 . Use a soft brush or damp cloth with mild detergent solution to gently wipe down all surfaces inside the motor housing including fans blades ,airways ,motors & bearings – try not getting water into any electronic component areas too much . Once everything looks clean enough simply reassemble in reverse order taking note not over tighten screws / nuts as this could cause further damage .
5 . Finally make sure when putting everything back together check for loose wires & connections , making sure they are tightly connected – then plug back into power supply & test out. Following these steps will help ensure that your Dyson stays in optimal condition for many years more.
How to Clean Dyson Canister Filter
If you own a Dyson canister vacuum, regular maintenance is essential for keeping your beloved appliance running in top condition. One of the most important parts to keep clean is the filter, which helps prevent dust and debris from spreading through your home. With proper cleaning and care, you can extend the life of your Dyson canister filter and keep it performing at its best.
To begin, unplug the vacuum and remove the bin or dirt container on top of the machine. Take out any inserted tools that may be inside as well. Next, locate the filters – usually there are two: one located behind a plastic flap near where you removed the bin or dirt container; this is called pre-motor filter; then there will be an exhaust HEPA (High Efficiency Particulate Air) post motor filter which should be visible once you open up either side panel at bottom of machine’s base.
Now it’s time to start cleaning! First off, remove both filters from their slots by gently pulling them outwards – some machines have clips that hold them in place so make sure these are undone first before attempting to take them out. Once removed set aside somewhere safe away from children or pets because if ingested they could prove hazardous for health).
For pre-motor filters simply use cold water with no soap/detergent needed – just rinse until all dust particles are gone (this type of filter must not get wet!). For post motor HEPA filters however warm water with diluted hand dishwashing detergent solution should do trick but always read instructions manual carefully before proceeding further). Allow both types to air dry completely prior to reinserting into slot again otherwise damage may occur due moisture getting trapped within inner workings causing problems down line when using).
Finally replace back into respective slots making sure each firmly pushed down properly until click heard indicating secure fitment achieved; also check other side panel now closed too without any gaps present as this help maintain suction power effectively during operation mode plus reduces noise levels emitted during vacuuming session also! We hope this guide has helped give insight on how best clean dyson canister vacuum’s internal filters safely allowing users peace mind knowing job done correctly every time thereafter!
Conclusion
Cleaning your Dyson handheld vacuum is a simple way to keep it running at its best. Here are the steps for cleaning your handheld vacuum:
1. Start by removing the bin from the device and emptying out any dirt or debris.
Make sure you do this outside, away from other people and pets as dust particles can be released into the air during this process.
2. Use a brush attachment to clean off the filter in order to remove any build-up of dust or debris that has accumulated over time. If needed, replace with a new filter if it’s too clogged up.
3. Clean around all moving parts like wheels and rollers to make sure they’re free of dirt and grime so they move freely when in use.
4. Wipe down all surfaces with a damp cloth or paper towel, making sure not to get water into any electrical components like switches or plugs – these should only be serviced by qualified technicians when necessary!
5 Finally, let everything dry before putting it back together again for another round of spotless vacuuming!