How to Clean Irobot Roomba: Step-by-Step Guide for Best Results
A clean iRobot Roomba works better and lasts longer. Regular maintenance is key.
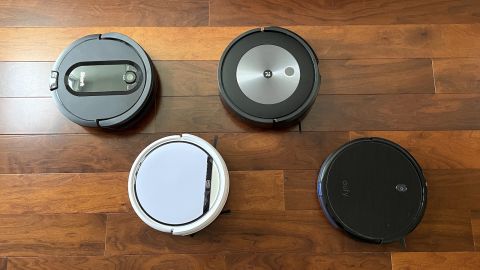
Do you own an iRobot Roomba? If yes, then you know how much it helps keep your home clean. But, like any other device, it needs proper care to perform its best. Cleaning your Roomba regularly ensures it runs smoothly and picks up dirt efficiently.
In this guide, we will show you simple steps to clean your Roomba. Even if you are not tech-savvy, you can follow these steps easily. Let’s dive in and learn how to keep your Roomba in top shape!
Tools And Materials Needed
Cleaning your Irobot Roomba ensures it works efficiently. Regular maintenance keeps your device performing well. Knowing the right tools and materials is crucial. This section will guide you on what you need.
Essential Cleaning Tools
Start with a small screwdriver. It helps remove screws easily. A soft-bristle brush is useful for delicate parts. Use a microfiber cloth to wipe surfaces. A handheld vacuum can clean the dustbin.
Recommended Cleaning Solutions
Choose mild detergent for a gentle clean. Avoid harsh chemicals; they can damage your Roomba. Warm, soapy water works well for cleaning. Use disinfectant wipes for germ-free surfaces.

Credit: www.techadvisor.com
Preparing Your Roomba
Cleaning your Roomba is essential for efficient performance. Before diving into the cleaning process, prepare your Roomba properly. This ensures the cleaning goes smoothly and safely. Follow these steps to get started.
Power Off And Unplug
First, turn off your Roomba. Press and hold the “CLEAN” button until the lights go out. This prevents accidental start-ups during cleaning. Next, unplug the charging dock from the wall. This ensures safety while you handle the device.
Remove The Dustbin
Locate the dustbin at the back of your Roomba. Press the release button to detach it. Carefully pull it out to prevent spilling debris. Empty the contents into a trash bin. Check for any stuck dirt or debris. Wipe the dustbin clean with a damp cloth. Make sure it’s dry before reattaching.
Cleaning The Dustbin
Clean your iRobot Roomba’s dustbin regularly to ensure efficient cleaning. Remove the dustbin, empty it, and rinse with water. Dry thoroughly before reassembling to prevent mold and odors.
Cleaning your iRobot Roomba’s dustbin is essential for maintaining its efficiency. A clogged or dirty dustbin can hinder performance, leaving your floors less clean than they should be. If you’ve ever wondered how to keep this nifty gadget in peak condition, you’re not alone. I remember the first time I cleaned mine—I was amazed at how much dirt it had picked up. Let’s dive into how you can easily clean the dustbin to keep your Roomba running smoothly.
Empty The Dustbin
Wipe Down The Interior

Credit: www.mykoshercart.com
Cleaning The Filter
Cleaning the filter in your Irobot Roomba is essential for optimal performance. First, remove the filter from the bin. Use a soft brush or tap it gently to remove dust. Regular maintenance keeps your Roomba working efficiently.
Cleaning your iRobot Roomba is crucial for maintaining its efficiency and prolonging its lifespan. One essential part of this process is cleaning the filter. Regular filter cleaning ensures that your Roomba can effectively capture dust and debris, keeping your home spotless. Neglecting this can lead to reduced suction power and, eventually, a less effective cleaning routine. Have you ever noticed a decrease in your Roomba’s performance? The filter might be the culprit.
Remove The Filter
First, make sure your Roomba is turned off to avoid any mishaps. Locate the dustbin on your Roomba and press the release button to remove it. Once you have the dustbin, you will find the filter inside; gently pull it out.
Filters are typically held in place by a small latch or tab. Take care not to damage it while removing. Remember, a gentle pull is all it takes.
Wash And Dry The Filter
Start by tapping the filter over a trash bin to remove loose debris. For a deeper clean, rinse the filter under lukewarm running water. Do not use soap or detergent as these can damage the filter material.
After washing, shake off excess water and place the filter on a flat surface to air dry. It’s vital to let it dry completely before reinserting to prevent mold growth.
Allow at least 24 hours for thorough drying. Reinsert the filter only when it’s fully dry, ensuring it snaps back into place securely.
Regular filter maintenance is simple yet immensely beneficial. Have you checked your Roomba’s filter recently? A clean filter equals a happy Roomba.
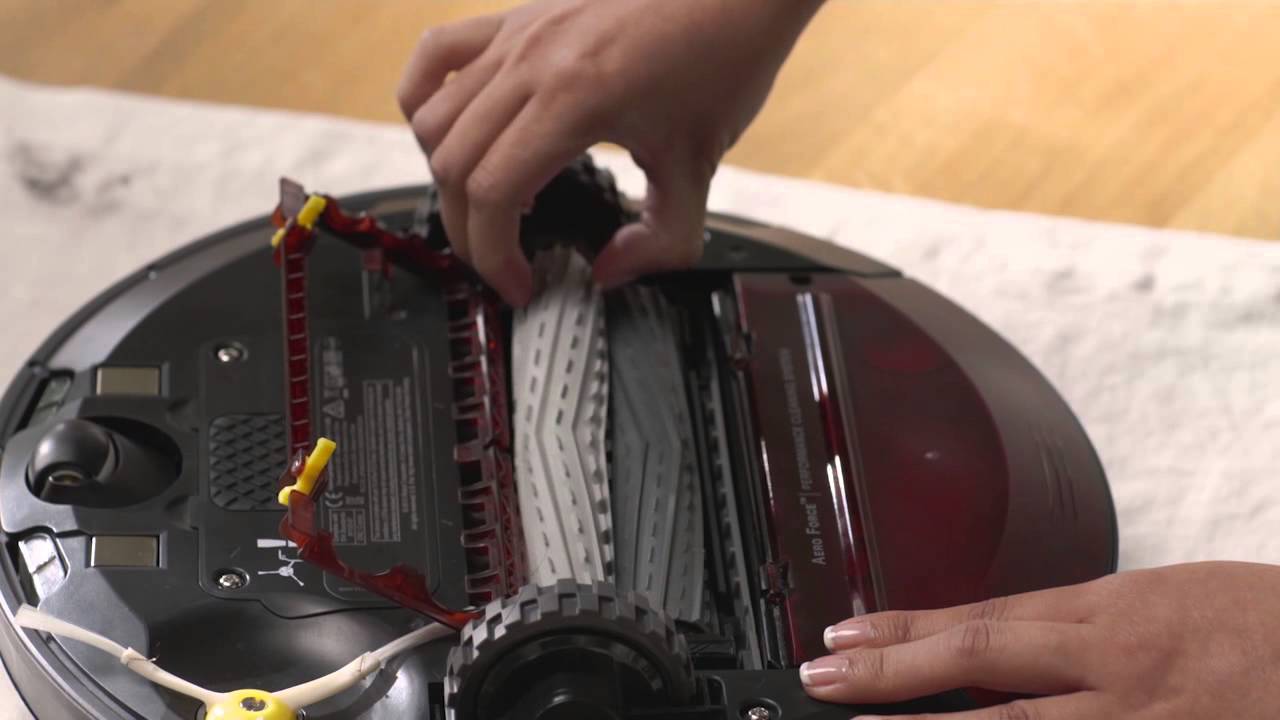
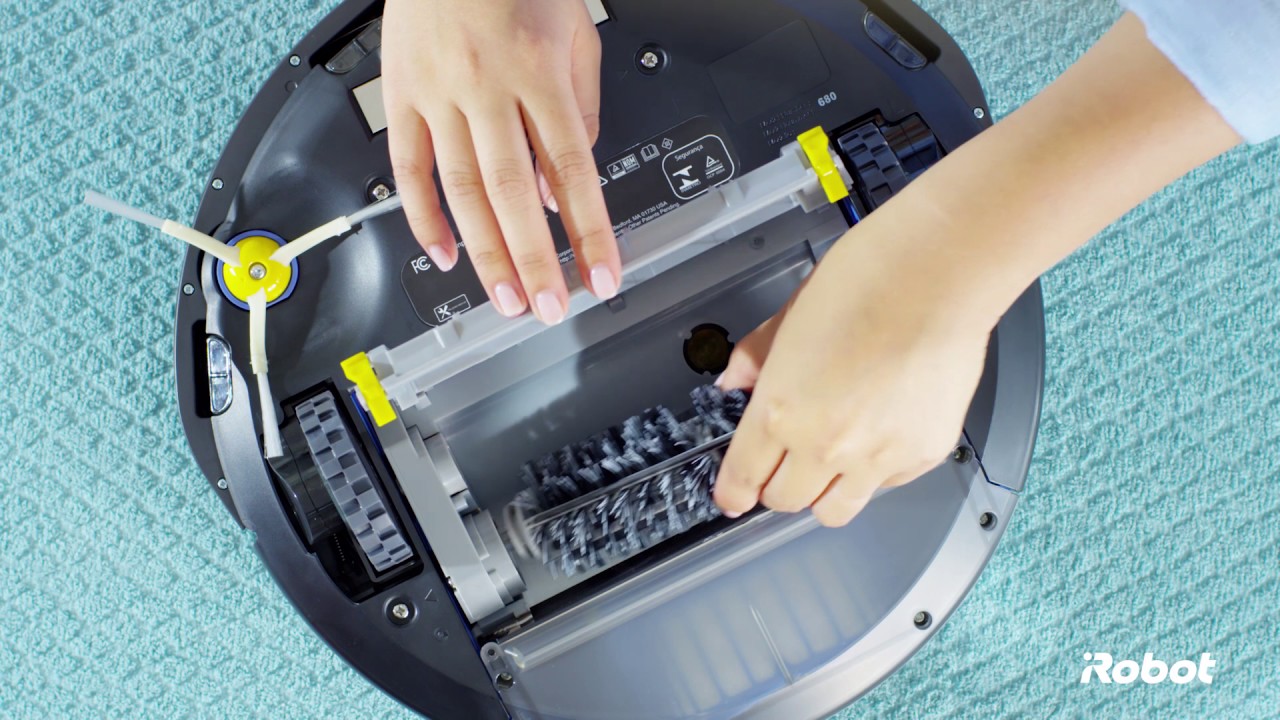
Cleaning The Brushes
Cleaning the brushes of your Irobot Roomba is essential. It ensures efficient performance and prolongs the lifespan of your device. Regular maintenance keeps the Roomba working effectively. It also helps avoid unnecessary wear and tear. Let’s dive into the process of cleaning the brushes thoroughly.
Remove The Brushes
Start by turning off your Roomba. Flip it over to access the brushes. Locate the brush compartment. Open it by pressing the tabs on each side. Gently lift the brushes out. Take care not to damage them during removal.
Clear Hair And Debris
Hair and debris often accumulate around the brushes. Use your fingers or a cleaning tool to remove them. Be thorough in clearing all visible dirt. Check for any strands wrapped around the brush. These can hinder the Roomba’s performance. Remove these strands carefully. Ensure the brushes are free from blockages. This will improve suction and cleaning efficiency.
Wiping Down The Sensors
Keeping your iRobot Roomba in top shape requires regular maintenance. One key task is wiping down the sensors. Dust and dirt can collect on these sensors, affecting performance. Cleaning them ensures your Roomba navigates effectively. Let’s explore how to clean these sensors efficiently.
Locate The Sensors
The first step is locating all the sensors on your Roomba. Sensors are on the underside and sides. They help Roomba detect walls and obstacles. Check the user manual for exact locations. Knowing their positions helps in proper cleaning.
Wipe With A Clean Cloth
Use a soft, clean cloth to wipe the sensors. Avoid using wet or damp materials. Gently rub the sensors to remove dust and debris. Ensure all sensors are thoroughly cleaned. This ensures Roomba functions optimally. Repeat this process regularly for best results.
Reassembling The Roomba
Cleaning your iRobot Roomba keeps it running smoothly. Remove debris from brushes and wheels. Empty the dustbin regularly for optimal performance.
Reassembling your Roomba is crucial after cleaning. A well-maintained Roomba performs better and lasts longer. After disassembling and cleaning, you need to put it back together carefully.
Reattach Brushes And Filter
Start with the brushes. Align the side brush with the screw hole. Ensure it fits snugly. Tighten the screw gently. Avoid over-tightening as it may damage the brush. Next, focus on the main brush. Slide it into place. Make sure it’s seated correctly. Insert the filter into its slot. Push until you hear a click. This ensures the filter is secure.
Secure The Dustbin
Now, it’s time to secure the dustbin. Slide the dustbin back into the Roomba. Ensure it clicks into place. Check if it’s locked properly. A secure dustbin prevents dust from escaping. Your Roomba is ready for action once everything is in place.
Maintenance Tips
Keeping your iRobot Roomba in peak condition requires regular maintenance. This not only extends its life but also ensures optimal performance. Simple tasks can make a big difference. Let’s dive into some essential tips to maintain your Roomba effectively.
Regular Cleaning Schedule
Create a cleaning schedule for your Roomba. Vacuum the dustbin after every use. This prevents clogs and keeps suction strong. Wipe the sensors with a soft cloth weekly. This helps the Roomba navigate smoothly. Inspect the brushes for hair and debris. Clean them every month. A clean Roomba works better and lasts longer.
Replacing Worn Parts
Parts like filters and brushes wear out over time. Check these components regularly. Replace them as needed. The filter should be replaced every two months. This ensures clean air and effective cleaning. Brush replacements depend on usage. Generally, replace every six months. Regular parts replacement keeps your Roomba efficient.
Credit: www.youtube.com
Conclusion
Keeping your iRobot Roomba clean ensures it works efficiently. Regular maintenance helps extend its lifespan. Clear debris from brushes and wheels. Empty the dustbin frequently. Clean the sensors for optimal performance. A well-maintained Roomba keeps your home spotless. Simple steps make a big difference.