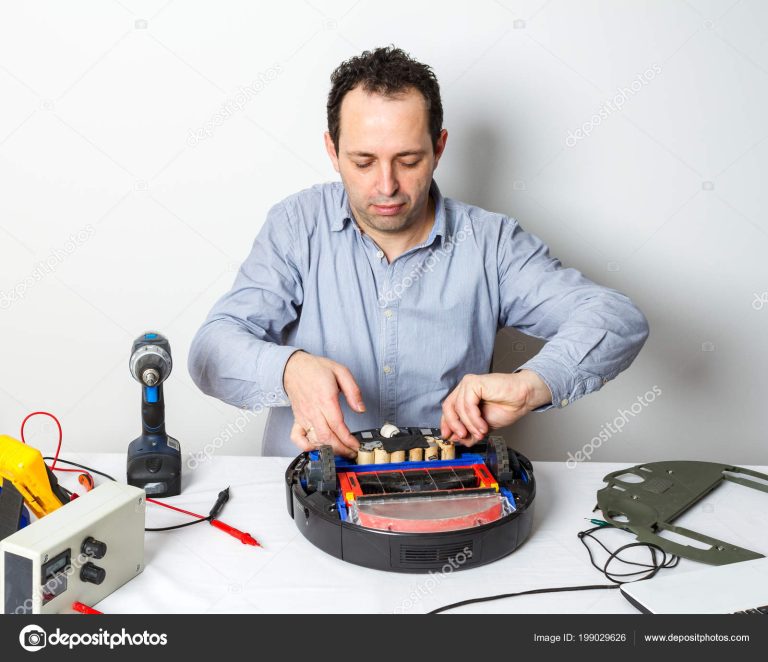
How to Remove Dust Mop Head?
Removing a dust mop head is fairly simple and should only take a few minutes. Start by unlatching the handle from the mop head, then turn it upside down so that you can access the attachment clips at the bottom of the dust mop. Depending on your specific dust mop model, there may be either 1 or 2 clips holding on to each side of the dust mop head.
Using your fingers, pull these clips outward until they release their grip on the dust mop cloth material. Once this is done, carefully slide out any foam pads that are located near where the handles were attached and discard them if necessary before inserting your replacement cloths into place. Finally attach both ends of new cloth to their respective attachment points and re-attach handle before using again.
- Detach the head from the handle: Start by detaching the dust mop head from its handle
- Most dust mops have a clip that attaches to either side of the handle, or a button at the base of it
- Squeeze or press this button or clip in order to detach it from the handle
- Remove any cloth strips attached to head: If there are any cloth strips attached to your dust mop head, remove them carefully and set them aside for cleaning separately if desired
- Shake off excess dirt and debris: Hold your dust mop head over an outdoor trash can and shake off as much dirt and debris as possible before washing it with water or soap
- 4 Wash with warm soapy water: Fill up a bucket with warm soapy water and submerge your dust mop into it for several minutes in order to thoroughly clean away all dirt, grime and bacteria that may be present on its surface area
- 5 Rinse with clean water : Next, rinse your dustmop under running tapwater until all traces of soap suds has been completely removed
- 6 Hang dry : Lastly , hang your freshly washed dsutmop up somewhere indoors where air can circulate freely around it , allowing for faster drying time

Credit: www.clean-mart.com
How Do You Get Dust Out of a Mop Head?
Maintaining a clean house means keeping your floors dust-free, and one of the best tools to do this is with a mop. But over time, that mop head accumulates dirt and debris, leaving it less effective in cleaning up messes. To get out all the dust and dirt from your mop head so you can keep your floors sparkling clean requires some effort on your part.
Before you start, make sure to wear protective gloves since you will be dealing with dirty water. First step is to remove the old mop head from its stick handle if easy to do so and place it into a bucket filled with warm water mixed with detergent or soap. Let the mop sit for about 15 minutes before extracting it from the solution; at this point use an old scrub brush or hard bristled brush to loosen any stuck particles off of the strands of material in the head itself.
Rinse out thoroughly once done then allow air drying for several hours before placing back onto your preferred handle type ready for use again around the home.
How Do You Remove a Quickie Dust Mop Head?
Removing the head of a quickie dust mop is relatively simple. Before attempting to remove it, be sure that you are safely standing on an even surface and have unplugged your vacuum cleaner if applicable. With one hand, hold the handle of the mop and with your other hand locate the release button located at the base of the head.
Hold this down while pulling up on the handle. This will cause a locking mechanism to disengage allowing for removal of the head from its holder. After removing it, you can then either wash or replace it depending on what best suits your needs.
To put a new or clean head back in place simply line up any grooves or tabs located at its base with those found in its holder before pushing down firmly until securely locked into place by hearing an audible click sound.
How Do You Remove a Removable Mop Head?
Removing a removable mop head is an essential part of cleaning and sanitizing your mop. To do this, you will need to start by unclipping the mop head from the handle. Once it has been detached, you should place it in a washing machine on a gentle cycle with detergent or soap and warm water.
Once finished, hang up the mop head on a clothes line or other drying rack until completely dry before re-attaching it to the handle. Be sure not to put any metal parts in the washer as they can rust over time if exposed to too much moisture! Additionally, check for signs of wear and tear such as loose threads or torn fabric before putting back onto your mop handle – if there are any issues with your removable mop head then best practice would be to replace rather than reuse so as not to spread germs around your home unnecessarily.
How Do You Clean a Microfiber Dust Mop Head?
When it comes to cleaning a microfiber dust mop head, it can seem like a daunting task. However, with the right steps and techniques, you can get your microfiber dust mop head clean in no time! To start off, shake out any excess dirt or debris that may be clinging to the fibers.
Next up is a thorough vacuuming of the entire surface area of the mop head – this will help to remove any embedded dirt particles that are hard to see. After vacuuming has been completed, you’ll want to fill a bucket with some warm water and detergent or mild soap specifically designed for use on microfiber cloths. Submerge your dust mop head into the mixture and gently swish around for about 10 minutes before rinsing several times with fresh water until all traces of soap have been removed from its fibers.
How to clean a microfiber dust mop
How to Put a Dust Mop Head on
Putting a dust mop head on can be done quickly and easily. Start by choosing the right size of dust mop head for your model of mop. Then, slide the plastic retainer clip onto one end of the mop handle bar and secure it with screws or rivets (depending on your model).
Once securely in place, insert each side of the dust mop into one side of the retainer clip until both sides click into place. Finally, pull back on the handle to make sure that everything is secure before you start using your new clean-up tool.
How to Clean Dust Mop
Regularly cleaning your dust mop is an important part of keeping it in good condition and making sure that it’s effective at removing dirt and debris. To clean a dust mop, start by shaking out the excess dirt or vacuuming the mop head with an upholstery attachment. Then soak the head in warm water mixed with a mild detergent, such as dish soap.
What Will Dust Mops Do When They Need to Be Changed
When dust mops need to be changed, it is important to follow the manufacturer’s instructions. Generally, this means replacing or washing the mop head when it becomes heavily soiled or worn. It may also require replacing mop handles and frames that have become bent or damaged over time.
Depending on how often the dust mop is used, these replacements should take place every few months in order to ensure a thorough and efficient cleaning job.
How to Use a Dust Mop
Using a dust mop is an easy and efficient way to keep your floors clean. To use the dust mop, start by sweeping or vacuuming up any large debris from the floor. Next, dampen the dust mop in warm water and wring it out until it’s just slightly damp.
Move the dust mop around in gentle strokes across the surface of your floor in order to pick up dirt and grime that may have been left behind after sweeping. For extra cleaning power, add some mild detergent to the water before you begin mopping. Once finished, hang up your dust mop so it can air dry completely before using again.
How to Clean Microfiber Dust Mop
To clean a microfiber dust mop, start by removing the mop head and wiping it down with warm water. Next, place the mop head in your washing machine and add a mild detergent. Wash on a gentle cycle using cold water, then tumble dry on low heat or air dry.
Homemade Dust Mop Treatment
Using a homemade dust mop treatment can be a great way to keep your home clean while avoiding the use of harsh chemicals and expensive store-bought products. This simple recipe calls for just two ingredients: white vinegar and water. Simply mix equal parts of each in a spray bottle, then spritz it liberally onto your dust mop before mopping up dirt and debris from your floors.
Dust Mop Treatment Home Depot
If you’re looking for an easy way to keep your floors clean, a dust mop treatment from Home Depot is an ideal solution. These ready-to-use treatments come in a variety of sizes to fit your needs and make it easy to remove dirt, dust, pet hair and other debris from hard surface floors. They also help reduce allergens and leave behind a pleasant scent that lasts up to 30 days.
Dust Mop Home Depot
The Dust Mop from Home Depot is one of the most effective cleaning tools for hardwood and other surfaces. Its unique design features an electrostatic treated cotton head that effectively traps dust, pet hair, and dirt particles while allowing air to circulate through the mop so it can be used on a variety of different flooring types. Plus, its ergonomic handle makes it comfortable and easy to use with very little effort needed.
Conclusion
Removing a dust mop head is an important part of ensuring the cleanliness and efficiency of your dust mop. It does not take much effort to do this task but it can save time and money in the long run. By following these simple steps, you will be able to ensure that your dust mop is kept in good condition for years to come.