How To Put Mop Bucket Together?
If you’re wondering how to put together a mop bucket, you’ve come to the right place. In this blog post, we’ll walk you through the process step-by-step. You’ll need a few supplies before you get started, including a mop bucket, a mop, and a mop wringer.
Once you have everything you need, follow these simple instructions:
1. Place the mop bucket on the floor.
2. Insert the mop wringer into the bucket.
3. Wet the mop in the sink and wring it out.
4. Place the mop head into the wringer and squeeze the handle to wring out the excess water.
5. Place the mop head on the floor and start mopping!
- Unscrew the mop bucket’s handle
- Insert the mop head into the bucket
- Screw the handle back on
- Fill the bucket with water
- Add cleaning solution to the water
- Swish the mop around in the water to wet it
- Squeeze the mop head to remove excess water
- Mop the floor
- Empty the bucket and rinse the mop head
- Let the mop head and bucket air dry
Credit: www.webstaurantstore.com
How do you fix a mop bucket wringer?
If your mop bucket wringer is broken, there are a few things you can do to try to fix it. First, make sure that the wringer is properly assembled. Sometimes the problem is simply that the wringer is not put together correctly.
If this is the case, you can try taking it apart and putting it back together again. If the wringer still does not work, the next thing to try is to lubricate the parts. This can be done with a light oil, such as WD-40.
Spray a little oil on the parts that move and then try operating the wringer again. If it still does not work, the problem may be with the spring. Sometimes the spring can become damaged or dislodged.
If this is the case, you will need to replace the spring.
What are the parts of a mop bucket?
Assuming you are referring to a standard mop bucket, there are four main parts:
1. The bucket itself – this is where you store the water and/or cleaning solution.
2. The wringer – this is attached to the bucket and is used to wring out the mop head.
3. The mop head – this is what you use to actually do the mopping.
4. The handle – this is attached to the mop head and is used to grip and maneuver the mop.
How do you use a mop pail?
A mop pail is a large bucket that is used to hold water and cleaning solutions. It is also used to store mops and other cleaning supplies. Mop pails typically have a handle and a spout for easy carrying and pouring.
Most mop pails also have a lid to keep the contents clean and dry.
To use a mop pail, first fill it with hot water and a cleaning solution. Then, dip the mop head into the pail and wring it out.
Mop the floor in a back and forth motion, covering the entire surface. When you are finished, rinse the mop head in the pail and wring it out again. Finally, empty the pail and allow it to air dry.
How do you use a janitor mop bucket?
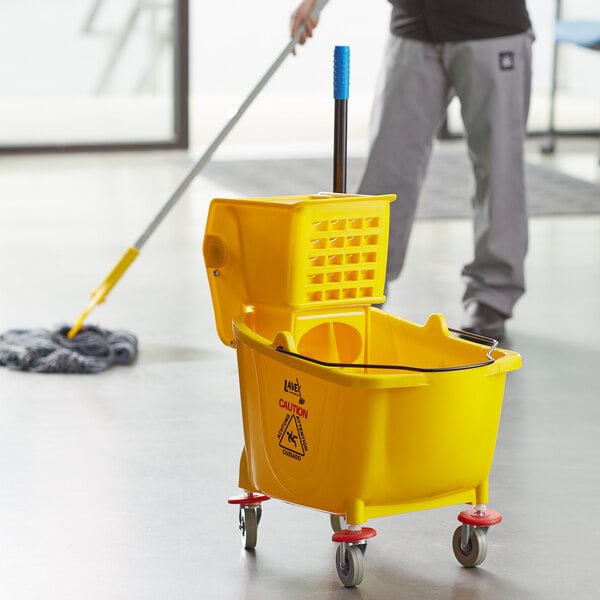
Assuming you are referring to the standard yellow plastic mop bucket with wringer attached:
Fill the bucket about halfway with hot water and your chosen cleaning solution. Swish the mop around in the bucket to saturate it, then wring it out so that it is only slightly damp.
Mop the floor in sections, starting at the farthest corner from the door and working your way towards the exit. Dip and wring the mop in the bucket as needed. When you’ve finished mopping, empty the bucket, rinse it out, and fill it with clean water.
Swish the mop around in the clean water to remove any residual cleaning solution, then wring it out and hang it up to dry.
Mop Bucket with Wringer
Ecolab mop bucket instructions
Assuming you would like blog post ideas for ecolab mop bucket instructions:
1. How to use an ecolab mop bucket
2. The benefits of using an ecolab mop bucket
3. The different types of ecolab mop buckets
Ecolab dual cavity mop bucket
If you’re looking for a top-of-the-line mop bucket, you can’t go wrong with the Ecolab dual cavity mop bucket. This bucket is specifically designed to make mopping faster and easier, and it does a great job of it. The bucket has two compartments – one for clean water and one for dirty water – which makes it easy to keep your mop water clean.
The bucket also has a built-in wringer, so you can wring out your mop without getting your hands wet.
The Ecolab dual cavity mop bucket is a great choice for anyone who wants a top-quality mop bucket that will make their mopping faster and easier.
Rubbermaid mop bucket wringer spring
If you have a Rubbermaid mop bucket, you may have noticed that the wringer spring can sometimes become dislodged. This can be a real pain, as it can make it difficult to wring out your mop. Thankfully, there is an easy fix for this problem.
All you need to do is locate the spring on the underside of the wringer. Once you have found it, simply push it back into place. That’s it!
Now your bucket wringer should be working like new again.
Rubbermaid mop bucket spring replacement
If you have a Rubbermaid mop bucket with a spring-loaded wringer, you may have noticed that the spring can sometimes become damaged or dislodged. If this happens, you’ll need to replace the spring in order to keep using your mop bucket.
Luckily, this is a relatively easy repair that you can do yourself.
All you need is a replacement spring and a few basic tools.
First, remove the old spring from the bucket. You can do this by gently prying it out with a screwdriver or another small tool.
Once the old spring is out, clean the area around the spring mount. This will ensure that the new spring can be properly seated.
Next, insert the new spring into the mount.
Make sure that it is seated properly and then replace the cover. That’s it! Your Rubbermaid mop bucket should now be as good as new.
Conclusion
Assuming you would like a summary of the blog post titled “How to Put a Mop Bucket Together”:
The blog post explains how to put together a mop bucket with a few simple steps. First, you need to gather the materials which include a mop bucket, a mop, a brush, and a dustpan.
Next, you need to find a level surface to put the bucket on. Once the bucket is in place, you can put the mop and brush inside. Finally, you can put the dustpan in the bucket.