How To Put A Mop Bucket Together?
If you’re wondering how to put a mop bucket together, you’ve come to the right place. In this blog post, we’ll walk you through the process step-by-step so that you can have your mop bucket up and running in no time.
First, you’ll need to gather all of the necessary materials.
You’ll need a mop, a bucket, a hose, and a squeegee. Once you have all of your materials, it’s time to start putting the bucket together.
Begin by attaching the hose to the spigot on the side of the bucket.
Next, fill the bucket with water. Once the bucket is full, place the mop inside.
Now, it’s time to start squeezing the water out of the mop.
To do this, use the squeegee. Start at the top of the mop and work your way down. Once you’ve squeezed all of the water out of the mop, you’re ready to start cleaning!
- Open the mop bucket
- Place the mop head inside the bucket
- Fill the bucket with water
- Place the handle of the mop through the hole in the lid of the bucket
- Close the lid of the bucket
Credit: www.webstaurantstore.com
How do you set up a mop bucket?
Assuming you would like detailed instructions on how to set up a mop bucket: You will need:
-1 Mop
-1 Mop Bucket
-1 Bottle of Cleaning Solution Instructions:
1. Fill the mop bucket halfway with water.
2. Add the cleaning solution to the water and stir until mixed well.
3. Place the mop in the bucket and allow it to soak for a few minutes.
4. Once the mop is saturated, wring it out so that it is only slightly damp.
5. Begin mopping the floor, using a back and forth motion.
6. Periodically dip the mop back into the bucket to re-wet it as necessary.
7. When you are finished mopping, empty the bucket and rinse it out with clean water.
8. Allow the mop and bucket to air dry.
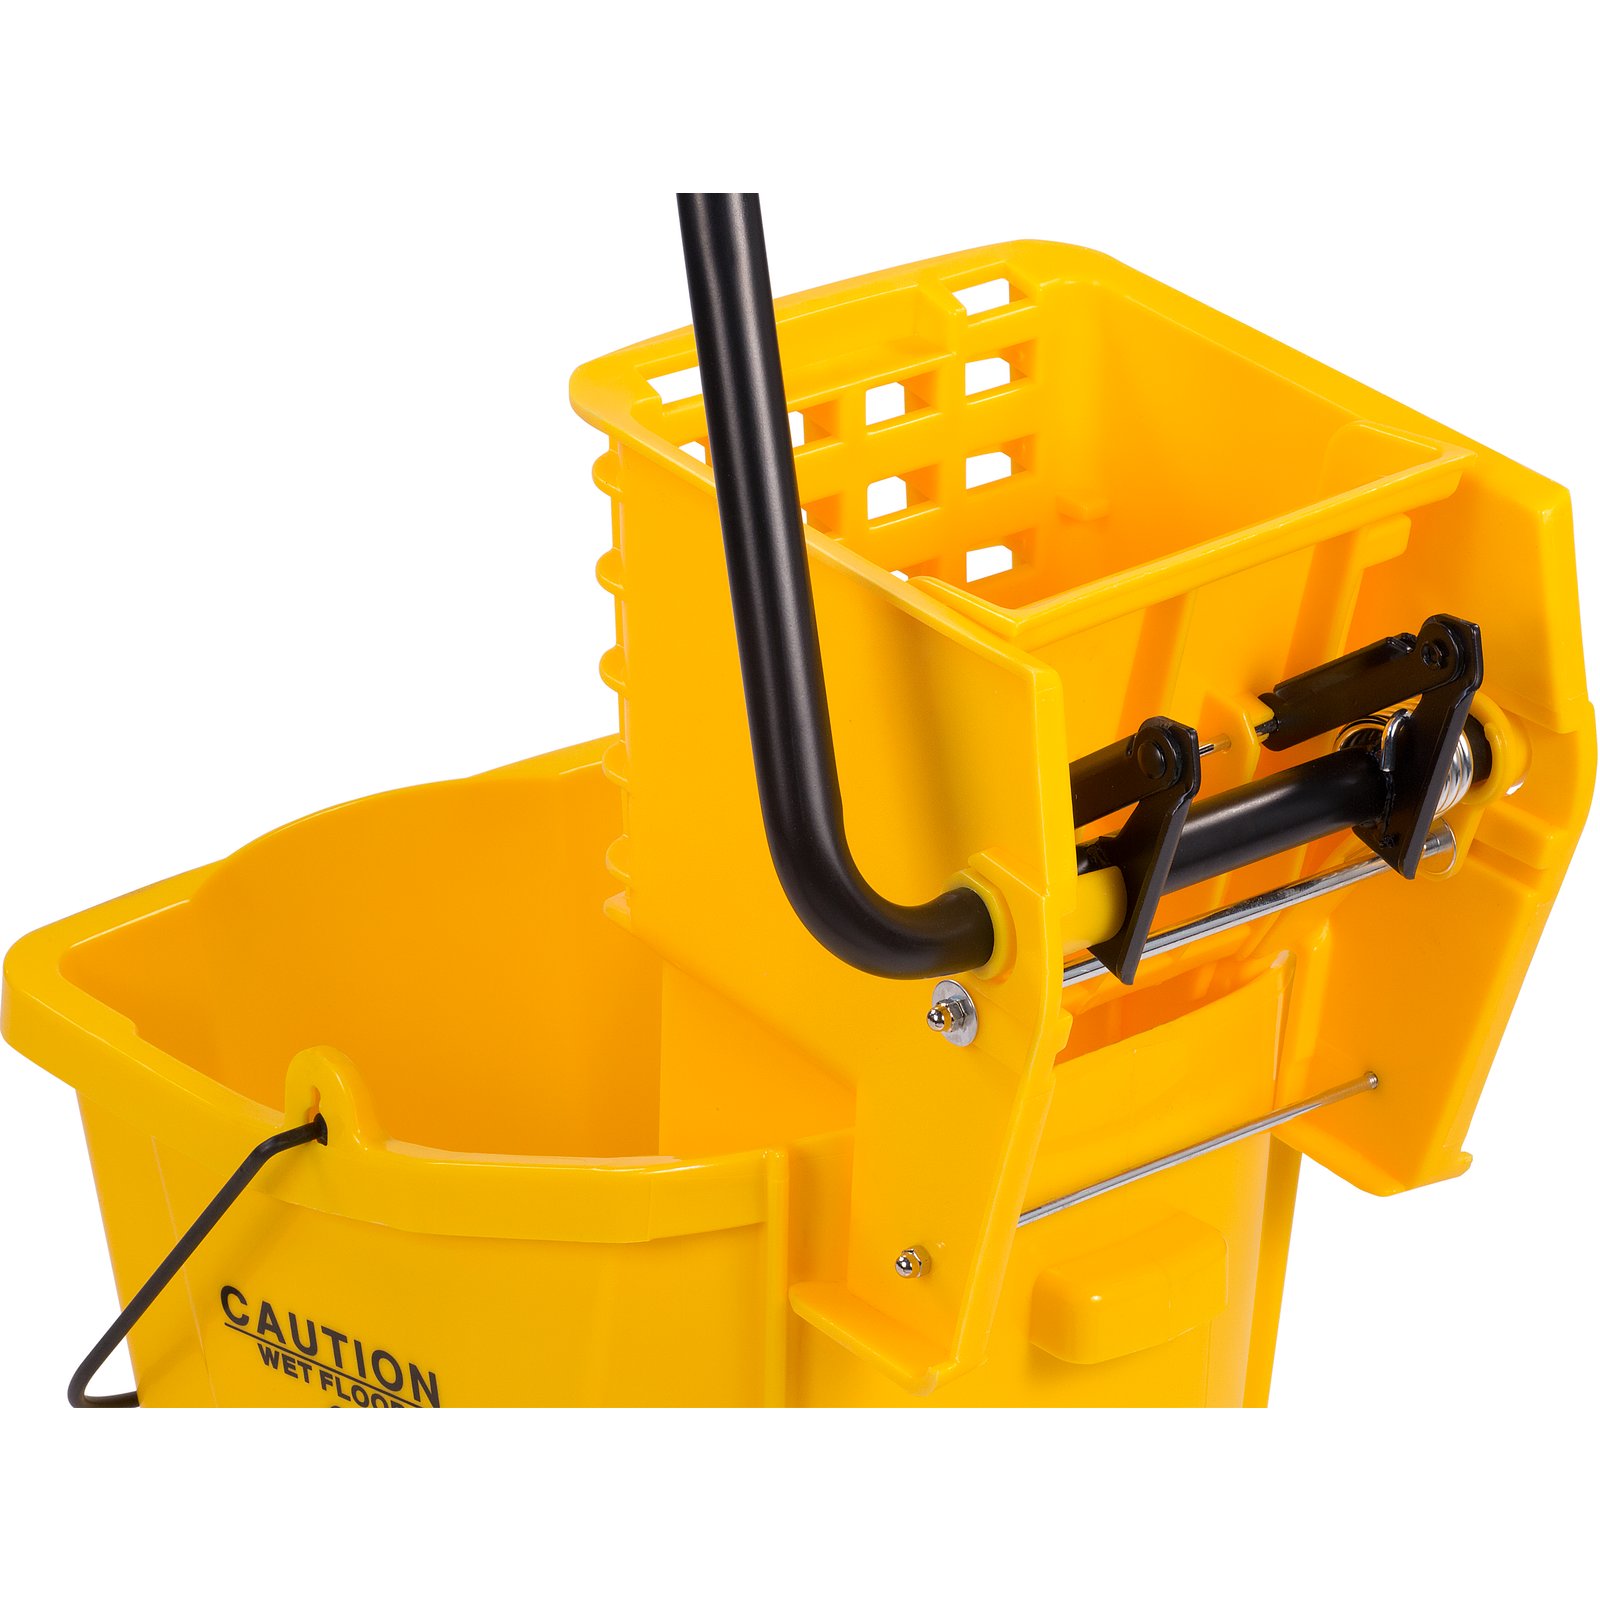
How do you fix a mop bucket wringer?
If your mop bucket wringer is not working properly, there are a few things you can do to fix it. First, check to see if there is anything blocking the wringer from turning. If there is, remove it and try again.
If the wringer still does not work, you may need to lubricate the wringer with WD-40 or a similar product. Finally, if the wringer still does not work, you may need to replace it.
What are the parts of a mop bucket?
Assuming you are talking about a standard mop bucket, there are four main parts: the bucket, the wringer, the mop handle, and the mop head.
The bucket is where you hold the water and cleaning solution. It is typically made of plastic or metal and has a spout for easy pouring.
The wringer is attached to the bucket and is used to squeeze the water out of the mop head. The mop handle is attached to the wringer and is used to hold and maneuver the mop head. The mop head is made of absorbent material, such as cotton or microfiber, and is used to actually clean the floor.
How do you clean a mop bucket?
Assuming you are referring to a traditional bucket and mop set up:
Fill the bucket with hot water and a small amount of soap. Swish the mop around in the soapy water to clean it, then rinse it in the hot water.
Empty the bucket and repeat the process with clean water to rinse the mop. Finally, hang the mop up to dry.
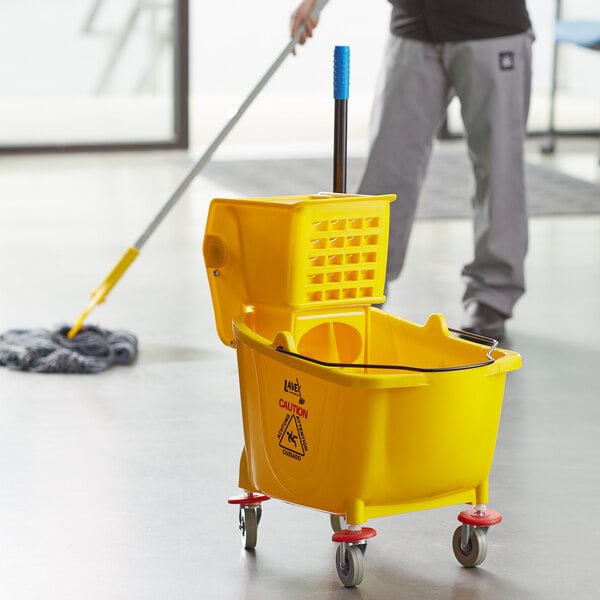
Mop Bucket with Wringer
How to use a mop bucket with wringer
If you’re like most people, you probably don’t think too much about how to use a mop bucket with wringer. But if you’re in the business of cleaning, this is an important tool that you need to know how to use properly. Here’s a quick guide on how to use a mop bucket with wringer:
1. Fill the bucket with clean water. You can use hot or cold water, depending on what you’re cleaning.
2. Add your cleaning solution to the water.
3. Dip your mop into the bucket and wring it out.
4. Mop your floor, moving the mop back and forth in a sweeping motion.
5. Dip the mop back into the bucket and wring it out again.
6. Repeat steps 4 and 5 until the floor is clean.
7. Empty the bucket and rinse it out with clean water. 8. Dry the floor with a clean towel.
That’s all there is to it! Using a mop bucket with wringer is a quick and easy way to clean your floors. Just be sure to follow these simple steps and you’ll have clean floors in no time.
Ecolab mop bucket instructions
Assuming you would like instructions on how to use an Ecolab mop bucket:
Ecolab mop buckets are designed for use with Ecolab’s line of floor cleaning products. The buckets are meant to be used with the corresponding Ecolab floor mops.
The buckets have two compartments – one for clean water and one for dirty water. To use, simply fill the clean water compartment with clean water and the appropriate amount of floor cleaner. Then, dip the mop head into the clean water and wring it out before mopping the floor.
When the mop head is dirty, dip it into the dirty water compartment and wring it out. Repeat as necessary until the floor is clean.
Ecolab dual cavity mop bucket
If you’re looking for a top-quality mop bucket, you can’t go wrong with the Ecolab dual cavity mop bucket. This bucket is made from durable plastic, and it features two compartments for holding your mop and cleaning supplies. The Ecolab dual cavity mop bucket is also equipped with a drain plug, so you can easily empty it when you’re finished mopping.
How to clean a mop bucket
If you’re like most people, your mop bucket is probably one of the dirtiest places in your home. But it doesn’t have to be that way! With a little bit of elbow grease and the right cleaning supplies, you can get your mop bucket sparkling clean in no time.
Here’s what you’ll need:
-A sponge or scrub brush
-Some sort of disinfectant (bleach, vinegar, etc.)
-Hot water
First, empty out your mop bucket and give it a good rinse with hot water. If there is any caked-on dirt or grime, use your sponge or brush to scrub it away.
Once the bucket is nice and clean, fill it up with hot water and your chosen disinfectant. Let the mixture sit for a few minutes before draining it out.
Now, take a clean sponge or cloth and give the inside of the bucket a good wipe-down.
Rinse out the bucket one more time and voila! Your mop bucket is now clean as a whistle.
Conclusion
If you’re wondering how to put a mop bucket together, don’t worry – it’s easy! Just follow these simple steps and you’ll have it done in no time.
First, take the bottom part of the bucket and place it on the ground.
Next, take the handle and insert it into the hole on the bottom of the bucket.
Now, take the mop head and dip it into the water. Once it’s wet, wring it out so that it’s not dripping wet.
Finally, put the mop head onto the handle and start mopping!