How To Assemble Mop Bucket?
Are you looking for an easy way to clean your floors? If so, then you need a mop bucket. Mop buckets are great for cleaning both hardwood floors and carpeted floors.
They can also be used to clean walls and ceilings. Assembling a mop bucket is easy and only takes a few minutes.
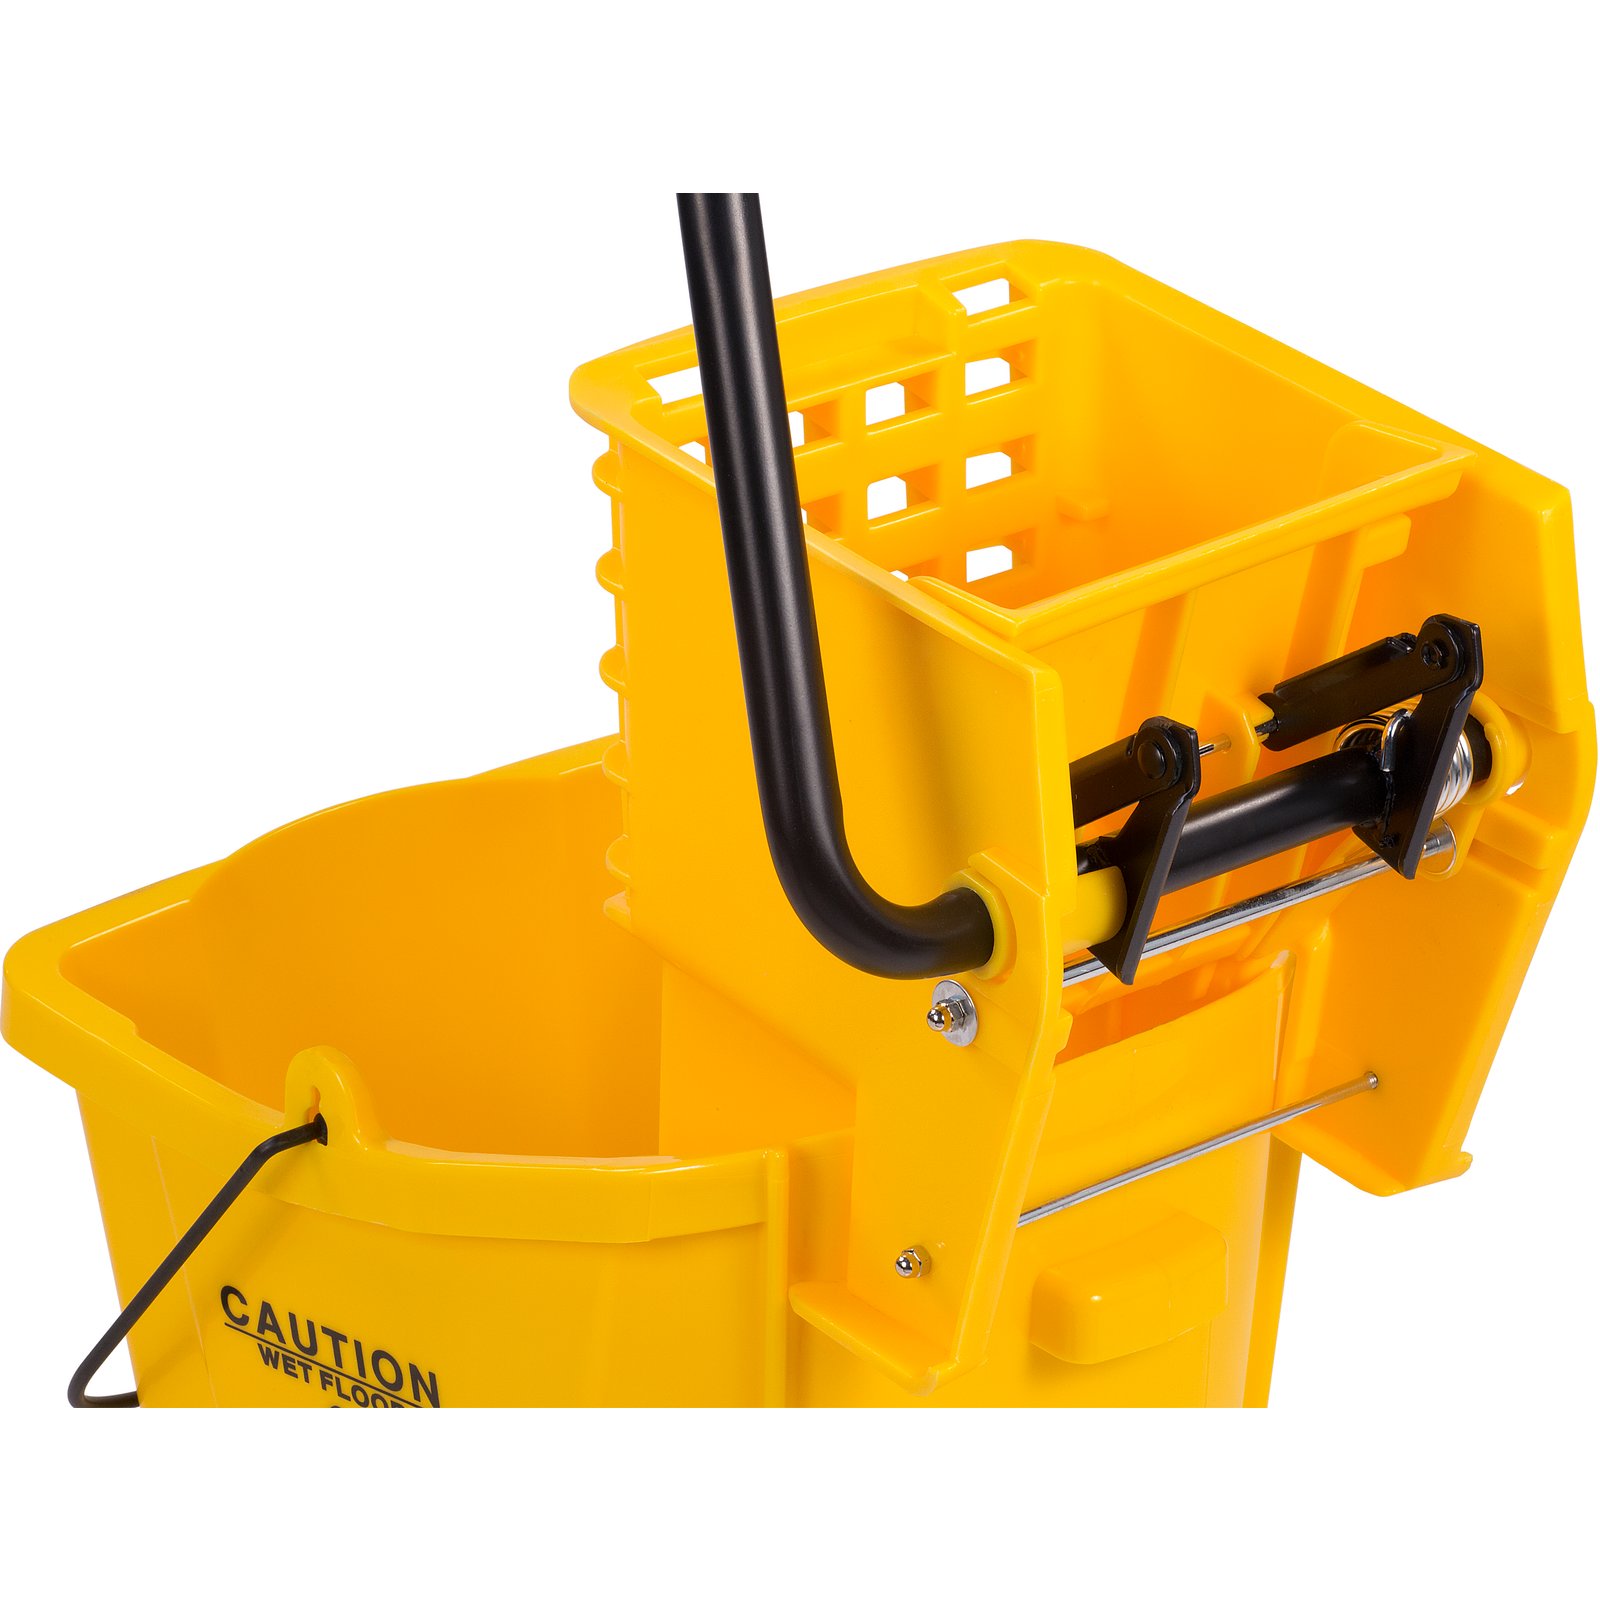
To assemble a mop bucket, you will need the following items: a mop bucket, a mop, a bucket handle, and a bucket wringer.
First, place the mop bucket on the floor. Next, insert the mop into the bucket. Then, attach the bucket handle to the bucket.
Finally, attach the bucket wringer to the bucket.
That’s all there is to it! Assembling a mop bucket is quick and easy.
Once you have assembled your bucket, you can start cleaning your floors.
Autolizer 360° Spinning Mop Unboxing and Install Instruction
- First, gather all of the necessary materials
- You will need a mop bucket, a mop, and a mop wringer
- Next, attach the mop wringer to the mop bucket
- Make sure that the wringer is securely attached so that it does not come loose while in use
- Now, insert the mop into the bucket through the wringer
- Be sure to push the mop all the way through so that the wringer can grip it properly
- Finally, crank the handle on the wringer to tighten it around the mop
- Once it is tight, you can begin mopping the floor
How to assemble mop squeezer
If you’re one of those people who is always looking for a better way to do things, you’ve probably considered buying a mop squeezer. Mop squeezers are devices that are designed to help you get more water out of your mop head, so that you can clean your floors more effectively.
There are a few different types of mop squeezers on the market, but they all work in basically the same way.
You place your mop head into the squeezer, and then you press down on the handle to extract the water.
Most mop squeezers are made of plastic, but there are also some metal models available. Whichever type you choose, make sure that it’s durable and easy to use.
Assembling a mop squeezer is usually a pretty straightforward process. Most models come with just a few parts that need to be put together, and the instructions should be easy to follow.
In general, you’ll need to attach the handle to the squeezer body, and then you’ll need to put the mop head onto the platform.
Once everything is in place, you should be able to start using your squeezer right away.
If you’re not sure which model of mop squeezer is right for you, it’s a good idea to read some reviews before you make your purchase.
How to assemble a mop head
Assuming you would like a blog post about how to assemble a mop head: “How to assemble a mop head” Detailed instructions on how to assemble a mop head.
Tools needed:
-Scissors
-Lighter
-Mop head
-Bucket
-Water
-Mop
Step 1: Start by cutting the string that is holding the mop head together. You will need scissors for this.
Step 2: Next, use a lighter to melt the end of the string. This will prevent fraying.
Step 3: Now it’s time to put the mop head on the mop.
Start by dipping the mop head in water.
Step 4: Next, put the mop head in the bucket.
Step 5: Finally, put the mop in the bucket and start scrubbing the floor!
Ecolab mop bucket instructions
Assuming you would like a blog post discussing how to use an Ecolab mop bucket:
When it comes to cleaning your floors, you want to make sure you are using a quality mop bucket. That’s why we recommend the Ecolab mop bucket.
Here are detailed instructions on how to use this bucket to get your floors clean and sparkling.
First, you will need to fill the bucket with hot water. You can do this by using the faucet attachment on the side of the bucket.
Once the bucket is full, add your preferred floor cleaning solution to the water.
Next, dip your mop into the water and solution mixture and start scrubbing your floor. Be sure to move the mop back and forth in a consistent pattern to avoid missed spots.
Once you have scrubbed the entire floor, it’s time to rinse. Dip your mop into the clean water side of the bucket and start going over the floor again. This time, you don’t need to be as vigorous with the mopping.
Simply rinse the floor to remove any residual dirt and cleaning solution.
Now that your floor is clean, you can let it air dry or use a towel to dry it off. Once it’s dry, enjoy your clean floors!
Ecolab dual cavity mop bucket
Ecolab’s dual cavity mop bucket is a great tool for keeping your floors clean. It has two compartments – one for clean water and one for dirty water – so you can easily switch between them as you clean. The bucket also has a wringer attached, so you can wring out your mop without getting your hands wet.
This bucket is perfect for anyone who wants to keep their floors clean without having to lug around a separate mop and bucket. It’s also great for people who have limited space, since the dual cavity design takes up less room than two separate buckets.
If you’re looking for an easy way to keep your floors clean, the Ecolab dual cavity mop bucket is a great option.
Wringer mop bucket
If you’re in the market for a new wringer mop bucket, there are a few things you’ll want to keep in mind. First, consider the size of the bucket. You’ll want one that’s large enough to accommodate your mop but not so large that it’s cumbersome to move around.
Second, think about the material the bucket is made from. Plastic is lightweight and easy to clean, but it may not be as durable as metal. Third, consider the wringer itself.
Some models have a foot pedal that makes wringing out your mop easier, while others have a hand crank. Lastly, take a look at the price. Wringer mop buckets can range in price from around $30 to $100, so choose one that fits your budget.

Credit: www.youtube.com
How do you set up a mop bucket?
Assuming you would like tips on how to set up and use a mop bucket:
Fill the bucket about halfway with hot water. Add a few squirts of dish soap or all-purpose cleaner.
Swish the water around to create suds.
Dip the mop head into the bucket, making sure to wring it out well so that it’s not dripping. Mop the floor in a back and forth motion, overlapping each stroke.
When you’re done, empty the bucket and rinse it out with clean water. Wring out the mop head and hang it up to dry.
How do you assemble a magic mop bucket?
Assuming you would like a step-by-step guide on how to assemble a magic mop bucket:
1. Start by placing the bucket on a flat surface.
2. Next, take the mop head and affix it to the handle.
Make sure the mop head is snapped on securely.
3. Once the mop head is attached, dip it into the bucket of water.
4. Ring out the mop head so that it is not dripping wet.
5. Begin mopping the floor in a back and forth motion.
6. When you are finished mopping, return the mop head to the bucket and make sure to empty out the dirty water.
7. Rinse the mop head with clean water and wring it out again.
8. Hang the mop head up to dry.
9. Store the bucket in a dry, safe place.
How do you put mop bucket wheels on?
Assuming you already have a mop bucket, you will need four wheels (two for each side of the bucket). You will also need something to attach the wheels to the bucket – this could be screws, nails, or adhesive.
To attach the wheels, first line up the wheels with the holes on the bottom of the bucket.
If using screws, insert a screw into each wheel and then into the bucket, tightening until the wheel is secure. If using nails or adhesive, apply these to the wheel and then to the bucket, holding the wheel in place until the adhesive dries. Repeat this process for the remaining wheels.
How do you fix a mop bucket wringer?
If your mop bucket wringer is not working properly, there are a few things you can do to fix it. First, check to make sure that the bucket is properly seated on the wringer. If it is not, then simply reattach it.
Next, check to see if the handle is properly attached to the bucket. If it is not, then you will need to reattach it. Finally, check to see if the spring is properly attached to the handle.
If it is not, then you will need to reattach it.
Conclusion
Assuming you would like a summary of the blog post titled “How to Assemble a Mop Bucket”:
This post walks the reader through the process of assembling a mop bucket. The first step is to identify all of the parts that come with the bucket.
Next, the base of the bucket is attached to the handle. The handle is then attached to the mop head. Finally, the reader is advised to test out the bucket to make sure everything is secure.