Eureka Robot Vacuum Brush Replacement: Easy DIY Guide
A clean home makes everyone happy. Eureka robot vacuums help keep floors spotless with ease.
But, like any machine, they need maintenance to work their best. One key part is the vacuum brush. Over time, it wears out and needs replacing. Replacing the brush is important for keeping your Eureka robot vacuum effective. A fresh brush picks up dirt and dust better, ensuring a cleaner home.
This blog will guide you through the process of replacing the brush. We’ll provide tips on when to replace it and how to choose the right brush. Follow along to keep your Eureka robot vacuum running smoothly and your home clean.
Introduction To Eureka Robot Vacuum Brush
Discover the ease of maintaining your Eureka Robot Vacuum with brush replacements. These brushes ensure optimal cleaning performance and longevity. Regular replacement keeps your vacuum efficient and your floors spotless.
The Eureka Robot Vacuum Brush is an essential part of your cleaning device. It sweeps up dirt, dust, and debris from floors. Keeping this brush in good condition is crucial for optimal performance. Regular maintenance and timely replacements ensure your Eureka robot vacuum works efficiently.
Importance Of Regular Maintenance
Regular maintenance of the Eureka Robot Vacuum Brush helps maintain its cleaning power. Dirt and hair can get tangled in the brush, reducing its effectiveness. Cleaning the brush periodically removes these obstructions. This simple step keeps your vacuum working at its best.
Ignoring maintenance can lead to a decrease in performance. A dirty brush may scratch floors or fail to pick up debris. It can also cause unnecessary strain on the vacuum’s motor. Regular maintenance prevents these issues and extends the life of your vacuum.
Benefits Of Replacing The Brush
Replacing the Eureka Robot Vacuum Brush offers many benefits. A new brush ensures the vacuum picks up dirt efficiently. It keeps your floors clean and free from dust and debris. You’ll notice an improvement in cleaning performance with a new brush.
A fresh brush also protects your floors. Worn-out brushes can damage surfaces. Replacing them prevents scratches and other damage. It helps maintain the beauty of your floors.
Regular replacement of the brush reduces wear on the vacuum. It prevents the motor from working harder than necessary. This prolongs the life of your Eureka robot vacuum. Regular replacements save you money in the long run.
“`

Credit: www.amazon.com
Tools And Materials Needed
Replacing the brush on your Eureka robot vacuum can seem daunting. But with the right tools and materials, the process is straightforward. This guide will help you gather everything you need to get the job done efficiently.
Essential Tools
To replace your Eureka robot vacuum brush, you will need some basic tools. A Phillips head screwdriver is crucial. It will help you remove and secure screws holding the brush in place. A flat head screwdriver is also useful. It helps in prying open the vacuum’s casing without damaging it.
A pair of pliers can come in handy. They can help in gripping and removing stubborn parts. A small brush or toothbrush is perfect for cleaning any debris. It ensures the new brush fits properly. Also, having a clean cloth nearby is good for wiping down parts.
Optional Accessories
While the essential tools are enough, a few optional accessories can make the job easier. Compressed air can blow away dust and small particles. This keeps the inside of your vacuum clean. A handheld vacuum is also useful. It can quickly remove dirt from the area where you are working.
If you have a magnetic tray, use it to hold screws. This prevents them from getting lost. A headlamp or small flashlight can improve visibility. It helps you see small parts and screws better.
By gathering these tools and materials, you can replace your Eureka robot vacuum brush easily. A little preparation goes a long way in making the task smooth and efficient.
Safety Precautions
Ensure the Eureka robot vacuum is turned off before replacing the brush. Handle parts carefully to avoid injury. Use compatible brushes for optimal performance.
Safety Precautions
Replacing the brush on your Eureka robot vacuum is a straightforward task, but taking safety precautions is crucial. This ensures your safety and keeps your vacuum in top condition. Let’s dive into the essentials to keep in mind.
Preparing Your Workspace
Before you start, clear a space to work. A clutter-free area reduces the risk of accidents.
Lay out all the tools you need. This might include a screwdriver, a new brush, and a cloth.
Ensure good lighting. This helps you see what you’re doing and avoid mistakes.
Handling The Vacuum Safely
Turn off your vacuum and unplug it. This prevents any accidental start-up that could cause injury.
When removing the old brush, be gentle. Forceful removal can damage the vacuum.
Secure the new brush properly. A loose brush can affect the vacuum’s performance.
Do you think these precautions are enough, or do you have more tips to share? Following these steps can make your brush replacement process smooth and safe. Remember, safety first!
Credit: www.amazon.com
Removing The Old Brush
Replacing the brush on your Eureka Robot Vacuum ensures optimal performance. Regular maintenance helps your vacuum run smoothly and efficiently. Let’s guide you through removing the old brush step by step.
Accessing The Brush Compartment
First, turn off your Eureka Robot Vacuum. This prevents accidental start-ups during the process. Next, locate the brush compartment on the underside. It’s typically secured with screws or clips. Use a screwdriver to remove any screws. If clips are present, gently unclip them to access the compartment.
Detaching The Old Brush
Once inside, you’ll see the brush attached to its holder. Carefully pull the brush out from its slot. Check for any debris or hair stuck in the holder. If present, clean the area thoroughly. This ensures the new brush fits perfectly. Dispose of the old brush responsibly. It’s often worn out and less effective.
Choosing The Right Replacement Brush
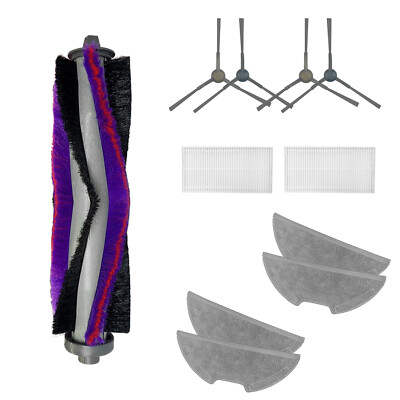
Selecting the right brush for your Eureka Robot Vacuum is essential for optimal cleaning. Ensure compatibility and quality for efficient dirt removal and long-lasting performance.
Choosing the right replacement brush for your Eureka Robot Vacuum ensures efficient cleaning. The brush is essential for picking up dirt and debris. A worn-out or incorrect brush affects vacuum performance. Selecting the right brush requires understanding your vacuum’s needs and options available. This section guides you on making the best choice.
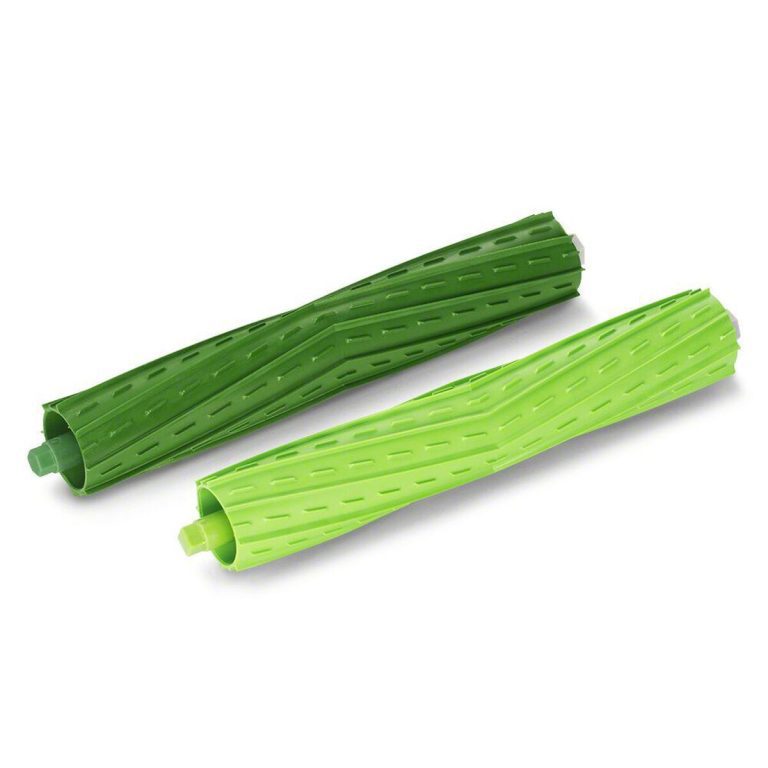
Types Of Brushes Available
Different brushes are available for Eureka robot vacuums. The main types include bristle brushes and rubber brushes. Bristle brushes are great for carpets and rugs. They dig deep to remove embedded dirt. Rubber brushes work well on hard floors. They are less likely to scratch surfaces. Each type has its benefits and ideal use cases.
Factors To Consider
Consider your floor type when choosing a replacement brush. Carpeted floors benefit from bristle brushes. Hard floors are best cleaned with rubber brushes. Check compatibility with your vacuum model. Not all brushes fit every model. Read product details to confirm a match. Consider the ease of maintenance. Some brushes are easier to clean and replace. Choose a brush that fits your cleaning routine and lifestyle.
Credit: www.ebay.com
Installing The New Brush
Replace the Eureka robot vacuum brush easily. First, remove the old brush by unlocking the cover. Next, insert the new brush securely.
Installing the New Brush
Replacing the brush on your Eureka Robot Vacuum can significantly improve its cleaning efficiency. It’s a straightforward task that you can easily do at home without any specialized tools. Follow these steps to ensure your vacuum is back to performing at its best.
Positioning The New Brush
First, make sure your vacuum is turned off and unplugged to prevent any accidents. Open the brush compartment by following the instructions in your manual. Remove the old brush carefully, noting its position and orientation.
Next, take your new brush and align it with the slots where the old brush was. Ensure the bristles are facing the right direction. It might help to take a quick photo of the old setup for reference.
Securing The Brush Properly
Once the new brush is in place, press it down gently but firmly. Make sure it clicks into position. Double-check that it’s securely fitted and not wobbling.
Close the brush compartment and tighten any screws or clips that hold it in place. Give the brush a gentle tug to ensure it’s locked in securely.
Test the vacuum by running it on a small section of your floor. Check for any unusual noises or movements. If everything looks and sounds good, your new brush is ready to tackle dirt and debris.
Have you noticed a difference in your vacuum’s performance after replacing the brush? Share your experiences in the comments below!
Testing The Installation
After replacing the brush on your Eureka Robot Vacuum, it’s crucial to ensure that everything is working correctly. Testing the installation helps you confirm that the new brush is properly installed and that the vacuum is functioning as expected. This step can save you time and prevent future issues. Let’s dive into how to effectively test the installation.
Running A Test Cycle
Start by charging your Eureka Robot Vacuum fully. A well-charged vacuum ensures consistent performance during the test.
Place the vacuum in a central location in your room. This gives it ample space to move around and clean effectively.
Turn on the vacuum and select a cleaning cycle. Observe its movement and listen for any unusual sounds, which could indicate improper installation.
Does the vacuum move smoothly? If yes, that’s a good sign.
Checking For Proper Function
Inspect the area the vacuum cleaned. Is it picking up dirt and debris efficiently?
Check the new brush for any signs of wear or damage. It should look as good as new after the first run.
Pay attention to corners and edges. Is the vacuum reaching these areas effectively with the new brush?
If everything looks good, your installation was successful. If not, you might need to recheck the brush installation.
Have you encountered any issues during the test cycle? Share your experiences in the comments below.
Maintenance Tips
Replace the brush in your Eureka Robot Vacuum every few months. This ensures efficient cleaning performance. Regular maintenance helps extend the vacuum’s lifespan.
Maintaining your Eureka Robot Vacuum is crucial for optimal performance and longevity. Regular upkeep ensures your device cleans efficiently, keeping your home spotless with minimal effort on your part. One critical component to focus on is the brush, which needs regular attention to continue picking up dirt and debris effectively.
Cleaning The Brush Regularly
Did you know that cleaning your vacuum brush can extend its life? It’s true. A tangled or dirty brush can reduce your vacuum’s effectiveness, making it work harder than necessary. You should routinely check the brush for hair, string, and other debris.
Set aside a few minutes each week to clean the brush. Use a small pair of scissors to gently cut away any entangled fibers. This simple task can enhance the performance of your Eureka Robot Vacuum significantly.
When To Replace Again
How do you know it’s time to replace the brush? Examine the bristles closely. If they appear worn down or uneven, it’s time for a replacement.
A good rule of thumb is to replace the brush every six months. But, if you have pets or lots of carpet, you might need to do it sooner. Keeping a spare brush handy can save you a lot of hassle when the time comes.
Taking these maintenance tips to heart can make a world of difference. How much easier would your life be with a vacuum that works at peak efficiency all the time?
Frequently Asked Questions
How Do You Change The Brush On A Robot Vacuum?
To change the brush on a robot vacuum, first turn off the device. Remove the brush cover, take out the old brush, and insert the new one. Secure the cover back and ensure it’s properly locked. Always consult your model’s manual for specific instructions.
Why Is The Brush Not Spinning On My Eureka Vacuum?
The brush on your Eureka vacuum may not spin due to a broken belt, debris, or motor issues. Check and replace the belt if needed. Clean any blockages and ensure the motor is functioning properly.
How Long Do Robot Vacuum Brushes Last?
Robot vacuum brushes typically last 6 to 12 months. Lifespan varies based on usage and maintenance. Regular cleaning extends their durability. Check the manufacturer’s guidelines for specific recommendations. Replace worn-out brushes to maintain optimal cleaning performance.
Conclusion
Replacing your Eureka robot vacuum brush is simple and essential. A fresh brush ensures efficient cleaning. It picks up more dust and dirt. Regular maintenance extends your vacuum’s life. Keep your home cleaner with minimal effort. Always check the manual for correct installation.
Use quality replacement parts for best results. Remember, a well-maintained vacuum saves time and energy. Enjoy a tidier home with ease. Your Eureka robot vacuum can perform like new again. Prioritize brush replacement for optimal performance. Clean homes start with smart maintenance.