How To Set Up A Mop Bucket?
If you’re like most people, you probably don’t think much about your mop bucket. But if you’re a professional cleaner, or you’re just responsible for cleaning your own home, you know that a mop bucket is an essential tool. But how do you set up a mop bucket?
There are a few things you need to consider when setting up your mop bucket. First, you need to decide what kind of mop bucket you want. There are two main types of mop buckets – the standard bucket with a wringer, or the spin mop bucket.
The standard bucket is the most common type, and it’s what most people think of when they think of a mop bucket. The spin mop bucket is less common, but it’s becoming more popular because it’s easier to use.
Once you’ve decided on the type of mop bucket you want, you need to choose the right size.
The size of the bucket should be based on the size of the area you’re cleaning. If you’re cleaning a large area, you’ll need a larger bucket. If you’re cleaning a small area, you can get away with a smaller bucket.
Once you’ve chosen the right size bucket, you need to choose the right accessories. The most important accessory is the mop. You need to choose a mop that’s the right size for the bucket you’ve chosen.
- Find a large, clean bucket to use as your mop bucket
- Fill the bucket with warm water and a mild cleaning solution
- Dip your mop into the bucket, making sure to wring it out well so that it is not dripping wet
- Mop the floor in small sections, rinsing the mop in the bucket as needed
- Once you have finished mopping, empty the bucket and rinse it out well

Credit: www.youtube.com
How do you use a mop bucket set?
Assuming you would like tips on using a mop bucket set:
Mop bucket sets typically include a mop bucket, a wringer, and a mop. To use one, first fill the bucket with hot water and your chosen cleaning solution.
Submerge the mop head in the solution, then wring it out so it’s not dripping. Mop the floor in a back and forth motion, being careful not to soak the floor or leave puddles behind. When the mop head starts to look dirty, dunk it back in the bucket, wring it out, and keep going.
When you’re finished, rinse out the mop head and bucket, and allow them to air dry.
What do you put in a bucket to mop the floor?
Assuming you are referring to a typical household mopping situation: The most important thing to consider when mopping the floor is the type of flooring material you have. Different flooring materials require different cleaning solutions and tools.
For example, tile and linoleum floors can be mopped with just water, while hardwood and laminate floors require a cleaner that won’t damage the finish. Once you’ve determined the appropriate cleaning solution for your floor, gather the following supplies:
-Bucket
-Mop
-Cleaning solution
-Rags or old towels
Fill the bucket with the cleaning solution and hot water. Wet the mop in the solution and wring it out. Start in a corner of the room and work your way across the floor, making sure to get into all the nooks and crannies.
Rinse the mop frequently in the bucket to avoid spreading dirt around. When you’re finished, empty the bucket and rinse it out. Wipe up any remaining moisture with a rag or old towel.
How do you assemble a mop head?
Assuming you would like a step-by-step guide on how to assemble a mop head:
1. Start by threading the mop head onto the mop handle. Make sure to thread it on tightly, so that it doesn’t come loose while you’re mopping.
2. Once the mop head is securely in place, wet it with water. You can either dunk it in a bucket or run it under the tap.
3. Next, add your desired cleaning solution to the mop head.
Again, you can either pour it directly onto the mop head or add it to a bucket first.
4. Finally, start mopping! Push the mop back and forth across the floor, making sure to cover the entire surface.
Should mop buckets be stored upside down?
When it comes to storing your mop bucket, there are a few things to consider. One of the main things to think about is whether or not you want to store your mop bucket upside down. There are a few pros and cons to storing your mop bucket upside down, so it’s important to weigh all of your options before making a decision.
One of the main advantages of storing your mop bucket upside down is that it can help to prevent mold and mildew from growing inside of the bucket. When water is left sitting in a mop bucket, it can start to grow mold and mildew. However, if the bucket is stored upside down, the water will drain out and it will be less likely to grow mold and mildew.
Another advantage of storing your mop bucket upside down is that it can help to keep the mop head from getting dirty. When the mop head is stored in the bucket, it can become dirty and full of germs. However, if the bucket is stored upside down, the mop head will be suspended in the air and it will be less likely to become dirty.
There are a few disadvantages to storing your mop bucket upside down as well. One of the main disadvantages is that it can be difficult to pour the water out of the bucket when it’s upside down.
Autolizer 360° Spinning Mop Unboxing and Install Instruction
How to use a mop bucket with wringer
When mopping your floor, you’ll want to use a mop bucket with a wringer to help make the job easier. Here’s a step-by-step guide on how to use one:
1. Fill the mop bucket with water and your chosen cleaning solution.
2. Dip the mop head into the bucket and wring it out until it’s only slightly damp.
3. Mop the floor in small sections, making sure to wring out the mop head often.
4. When you’re finished, empty the mop bucket and rinse out the mop head.
What to put in a mop bucket
When it comes to mopping the floor, there are a few different ways to do it. You can either use a traditional mop and bucket system, or you can use a steam mop. Whichever method you choose, there are a few things you should always put in your mop bucket.
First, you’ll need to add water. The amount of water you’ll need will depend on the size of your bucket and the size of the area you’re cleaning. If you’re unsure, it’s always better to err on the side of too much water rather than too little.
Once you’ve added the water, you’ll need to add a cleaning solution. There are a variety of options available, so you can choose one that’s best suited for your needs. If you’re unsure, ask a sales associate for help in selecting the right one.
After you’ve added the water and cleaning solution, you’ll need to add a disinfectant. This is important for killing bacteria and ensuring a clean and safe environment. Again, there are a variety of options available, so you can choose one that’s best suited for your needs.
Once you’ve added all of the necessary ingredients to your mop bucket, you’re ready to start mopping!
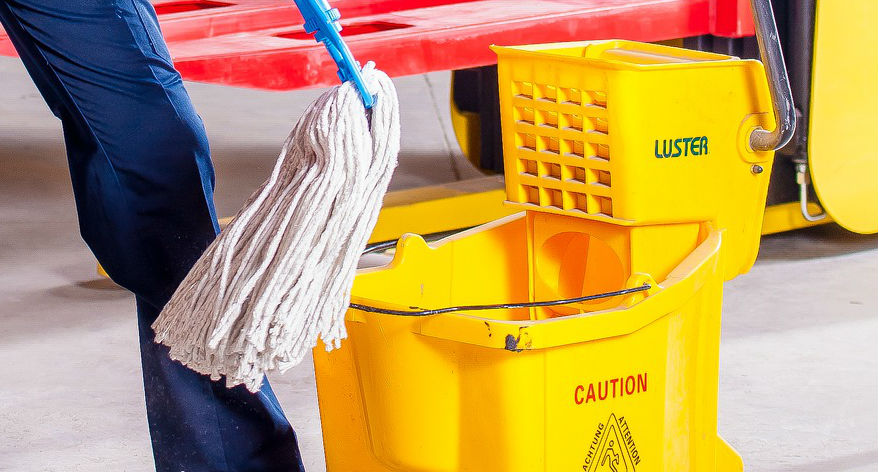
How to use yellow mop bucket
Assuming you would like a blog post discussing the proper way to use a yellow mop bucket: When it comes to cleaning, one of the most important tools in your arsenal is the mop bucket. This is especially true for those who have to clean large areas on a regular basis.
A good mop bucket can make your life a lot easier and help you get the job done faster. Of course, not all mop buckets are created equal. Some are better than others.
If you’re looking for a top-quality mop bucket, you can’t go wrong with a yellow mop bucket. Yellow mop buckets are known for their durability and performance. So, how do you use a yellow mop bucket?
Here’s a quick guide:
1. Fill the bucket with warm water. Add your preferred cleaning solution to the water.
2. Place your mop inside the bucket. Make sure the mop is fully submerged in the water.
3. Use the wringer to squeeze the water out of the mop.
4. Mop the floor in your desired pattern.
5. Empty the bucket when you’re finished. Rinse the bucket out with clean water.
6. Let the bucket air dry. That’s all there is to it!
How to properly mop a tile floor
If you have tile floors in your home, then you know that they can be difficult to clean. But with the right technique, you can get them sparkling clean in no time. Here’s how to properly mop a tile floor:
1. Start by sweeping the floor to remove any dirt or debris.
2. Fill a bucket with warm water and add a mild detergent.
3. Dip your mop into the bucket and wring it out well.
4. Mop the floor in a back and forth motion, overlapping each stroke.
5. Rinse your mop frequently in the bucket of clean water.
6. When you’re finished, rinse the floor with clean water to remove any soap residue.
With these simple tips, you can keep your tile floors looking clean and sparkling all year long!
Conclusion
In order to set up a mop bucket, you will need the following supplies: a mop, a bucket, and a way to transport the bucket of water. You will also need a source of water, such as a faucet or hose. First, fill the bucket with water.
Next, wet the mop in the water and wring it out so that it is damp, not dripping wet. Then, mop the floor in the desired area. When you are finished, empty the bucket and rinse the mop.